
I’ve always wanted a walk-in cooler but assumed they were for the rich and the restaurant owners–not humble outdoor journalists like myself.
But around this time last year, my perspective changed. I learned about a device that makes it possible for anyone to construct their own extra-cold room, so I decided to give it a shot.
In the end, I built a walk-in cooler out of an old shed on my property for less than $1,500. It took some luck on Facebook Marketplace (more on that below), but to my utter amazement and delighted surprise, it actually works.
Why Would You Want a Walk-in Cooler?
Hunters across the American south know better than anyone the struggle of butchering a big-game animal in the heat. Temps can easily reach the 90s during bow season, and even in November and December, highs in the 70s and 80s are common.
In those kinds of conditions, hanging an animal outside or in a garage to allow the meat to age and tenderize isn’t an option. I usually resort to large coolers filled with ice, but this leaves something to be desired. The animal doesn’t always fit, for one thing. For another, the ice must be drained and replaced every day (at least), and even then, it’s impossible to keep the meat totally dry.
That’s why, for me, living in Texas, a walk-in cooler was always so desirable. It gives me a way to hang the entire animal, allow the muscles to relax and tenderize, and make the most of every harvest.
The Cold, Cold Heart of the System
The CoolBot is what makes a do-it-yourself walk-in cooler possible. Some of you may have already heard of this device, but I hadn’t before last year when a friend sent me a link to the website. CoolBot is not sponsoring this article, and they haven’t sent me any money. But the product really works, which is why I’m excited to tell you about it.
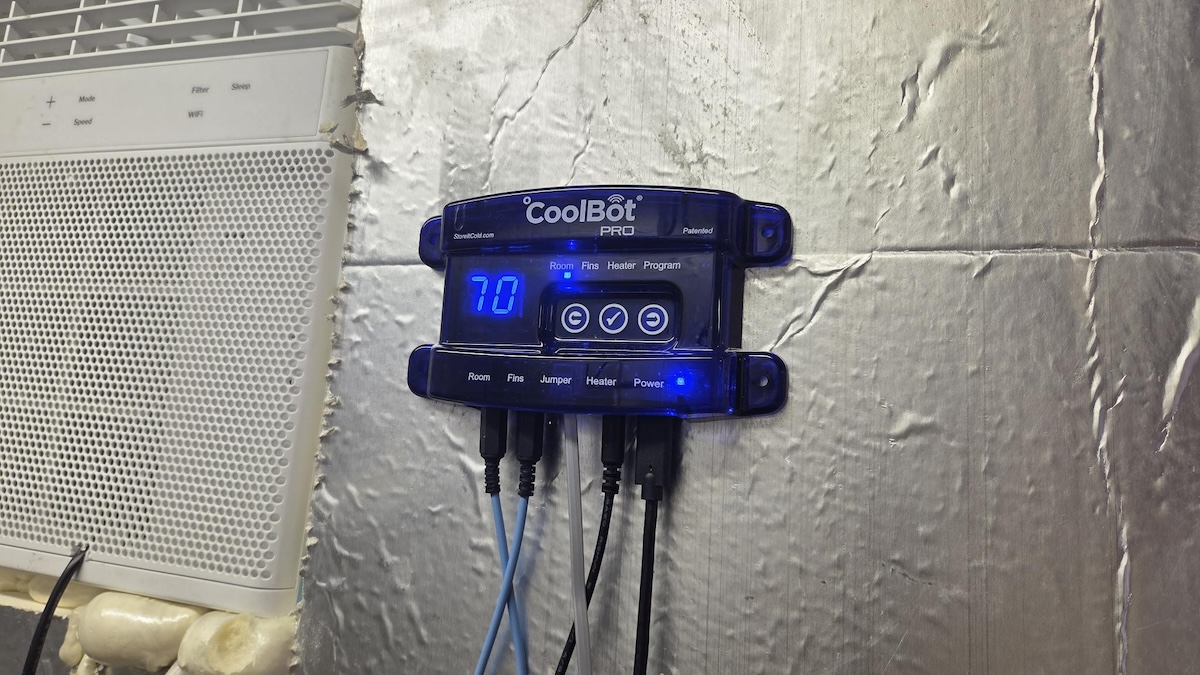
The CoolBot device connects to a regular window A/C until and overrides the A/C’s temperature sensor. It forces the unit to blast the coldest possible air, which is enough to cool a properly insulated room down to near freezing.
It’s easy to install and easy to operate, and the Pro model I used connects to WiFi. This allows you to control the temperature and monitor the hardware with the CoolBot app even when you’re not at home. I didn’t try to change the temperature with meat in the cooler, but it did give me peace of mind that my hard work wasn’t rotting away.
Unfortunately, understanding how the system works is the easy part. Building the cooler is more of a challenge–especially for an English major such as myself. But I donned my hardhat (I don’t have a hardhat), channelled Tim the Toolman, and got to work.
Step 1: Plan Your Cooler Size
The first step in this process is to decide where you’re going to build your cooler. This will determine how large the cooler will be and which A/C unit you need.
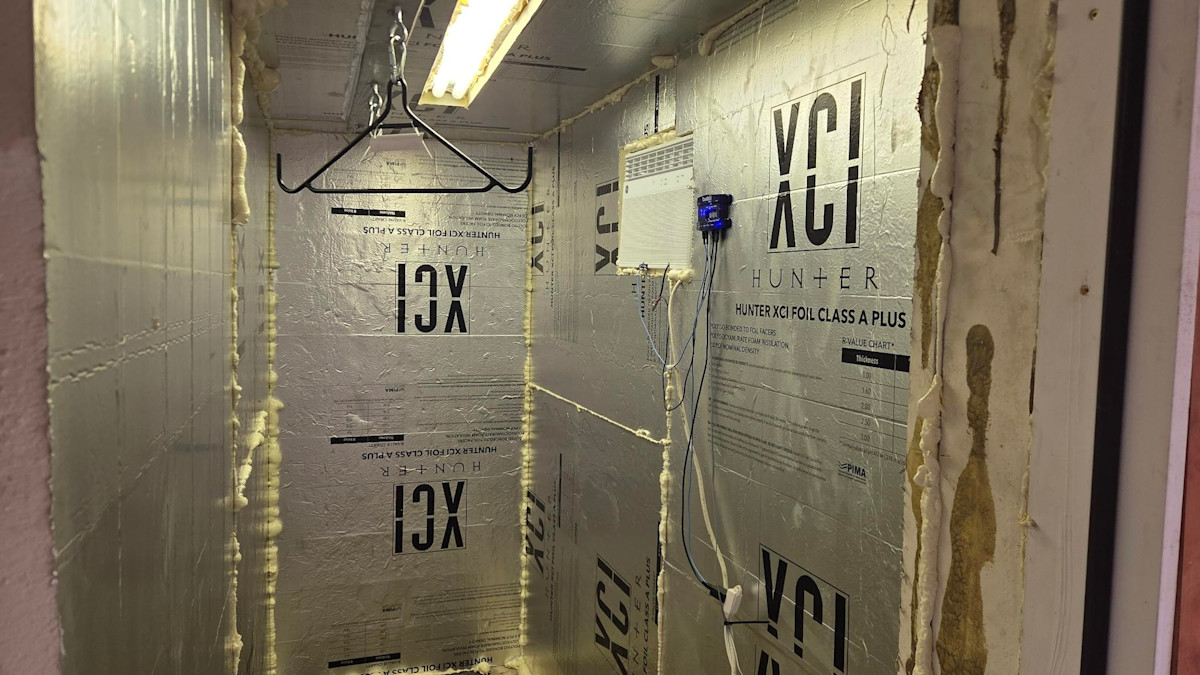
I decided to build mine in an old shed attached to a carport. I didn’t need the cooler to be particularly large–I just wanted enough room to hang two or three animals at a time. So, I built a wall to create a space ten feet long and four feet wide. The ceiling is about eight feet tall.

I learned two things building the cooler that I wish I would have known at this point in the process. First, it helps to use a room that’s level and square. This shed is not. I don’t know who built it, but I don’t think they knew how to use either level or a square. The room’s considerable slope made insulating it more difficult, though not impossible.
Second, don’t forget that putting 4 to 5 inches of insulation on all four walls and the ceiling will significantly reduce the size of your cooler space. I didn’t account for this when I built the wall, and I wish I would have. I still have enough room to hang two or three animals, but I would have liked a little more space.
Once you settle on the size of your cooler, you can select the right A/C unit per CoolBot’s handy chart.
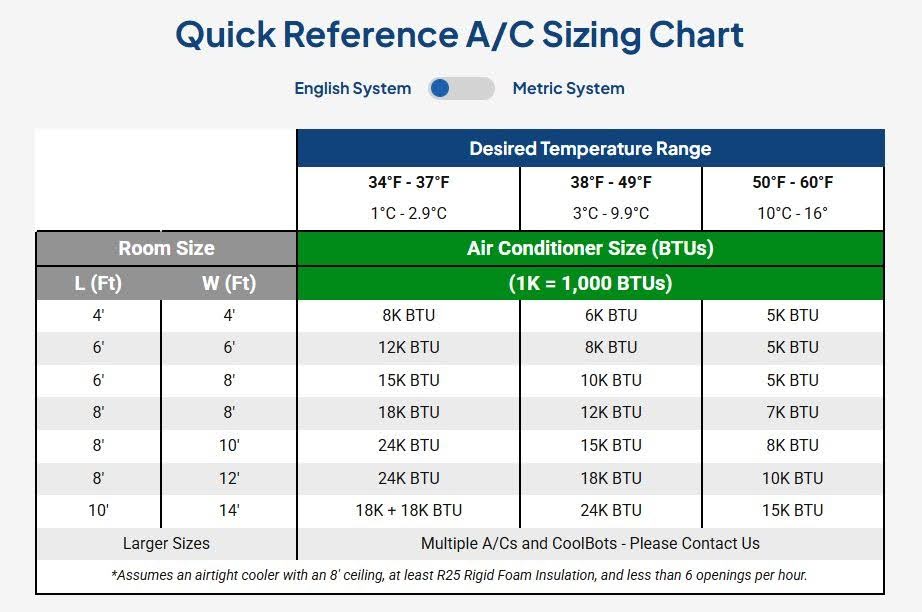
BTUs are listed in the AC’s product description, so be sure to select one with enough juice. I went with a model slightly overpowered for my space. CoolBot staff cautioned that high BTU’s can’t compensate for a poorly insulated room, but it can help ease the pressure on the unit if you live in a hot climate. I don’t need the room to be colder than 38 degrees, but I do plan to run it during the winter and the summer. So, I went with a 10,000 BTU unit.
Once you know your BTU level, select a compatible A/C from CoolBot’s list. That list includes models that have been verified to work with the CoolBot, though others will work as well. If you already have a window A/C you want to use, be sure it has a digital display.
Step 2: Source Your Insulation
Insulation will be the most expensive part of this project, so it’s important to think carefully about what you need and where you can get it.
The room needs to be insulated to offer a thermal resistance of R-25 or greater on the walls and ceiling. If you don’t know what this means, don’t feel bad–I didn’t either. It’s actually pretty simple. A piece of insulation’s “R-value” describes how well it insulates. You’ll see this value listed on the product description for any type of insulation.
For example, this foam board has an R-value of 3. To reach R-25, I’d need to layer nine of these boards on top of one another. Whatever combination of insulation you use, the total has to be R-25 or greater if you want the room to cool properly.
The rolled-up pink stuff that’s in the walls of your house won’t work for this project. Moisture can get trapped in the fibers, which will then grow mold and start to stink.
For this, you need to use either closed-cell spray foam or rigid foam board insulation.
There are spray foam insulation kits you can buy online, or you can get quotes from local spray foam professionals. This is an attractive option because spray foam is easier to install than foam boards, and it offers an excellent seal. The downside, and why I ultimately chose to use foam boards, is the cost. I would have needed two of those do-it-yourself kits to insulate my space, which would have cost over $1,400.
You’ll need about five inches of foam board to hit R-25. Ideally, you’ll use 4x8 sheets that are four inches thick, and then layer one-inch boards on top of those. However, four-inch boards can be tough to find, so you might have to stack three layers–two layers of two-inch boards and then another one-inch board on top of that.
If I did that for my space and purchased all those boards at Home Depot, my total cost would have been $1,170.
Fortunately for me, I didn’t have to buy all those boards from a big box store, and I suspect you won’t have to, either. I found multiple listings of foam insulation boards on Facebook Marketplace. I don’t know where these boards come from–maybe home builders order too many or a build project falls through. But the cost is significantly less than purchasing new boards from a building supply store. You might have to be a little choosy to find boards in good condition, but if you have some time and are patient, there are deals to be found.

I got 10 4’x8’x4” boards for $15 each. The guy who sold them to me said they were R-26, but when I took them home and did my own research, I realized they were actually R-23. When I pointed this out, the seller let me come back and pick up another 10 aluminum wrapped 1.5-inch boards for free.
You might not get so lucky, but, again, I think there are deals to be found if you do your due diligence.
Step 3: Find and Install a Door
You don’t need a specialized cooler door for this project, but you should use an exterior door. Exterior doors are already insulated, and they come with weather stripping to make sure all that cold air stays where it’s supposed to.
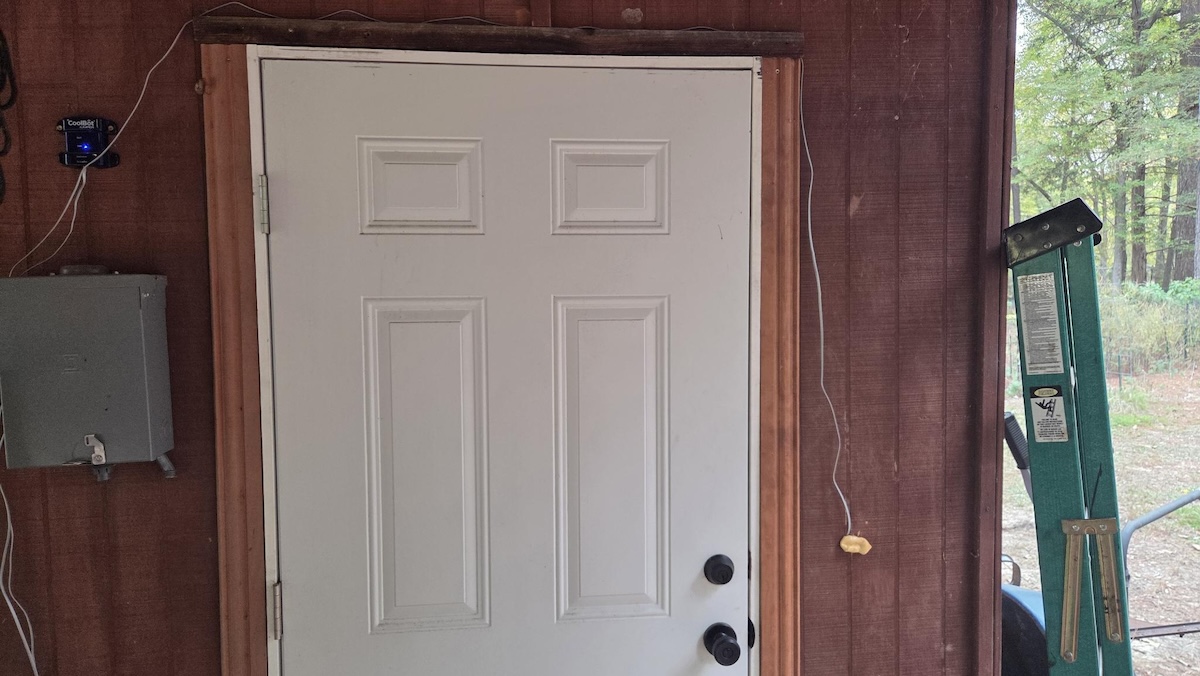
I found someone selling exterior doors on Facebook Marketplace for about $200. The door was already hung in a frame, which made installation a little easier. All I had to do was cut a hole in the wall, build a stud opening, and install the door.
I won’t get into the details of this process because, frankly, I didn’t really know what I was doing. It took several YouTube tutorials and a good bit of trial and error to get the door to close properly.
I can tell you that this exterior door was insulated enough to keep the room 38 degrees in 92-degree weather. However, the first time I used the cooler, condensation started to form on the outside of the door, especially on the handle and lock. This eventually caused the frame to swell and the door to stop closing smoothly.
To fix this problem in the future, I plan to glue a 1.5-inch foam board on the inside to help reduce that condensation.
Step 4: Install the Air Conditioner
When you choose your cooler space, be sure you have a plan to run power to that space. You’ll need a 20-amp circuit to run the A/C, and then you’ll also want some kind of light source. The shed I used was already wired for a light, but the circuit wouldn’t be able to handle the A/C. So, I tapped into a 50-amp circuit that runs to an RV outlet on our property. I ran the wire to a breaker on the outside of the cooler, then wired in an outlet inside the cooler.
At this point I should mention that I am not an electrician, so you should consult a professional before you start an electrical fire.
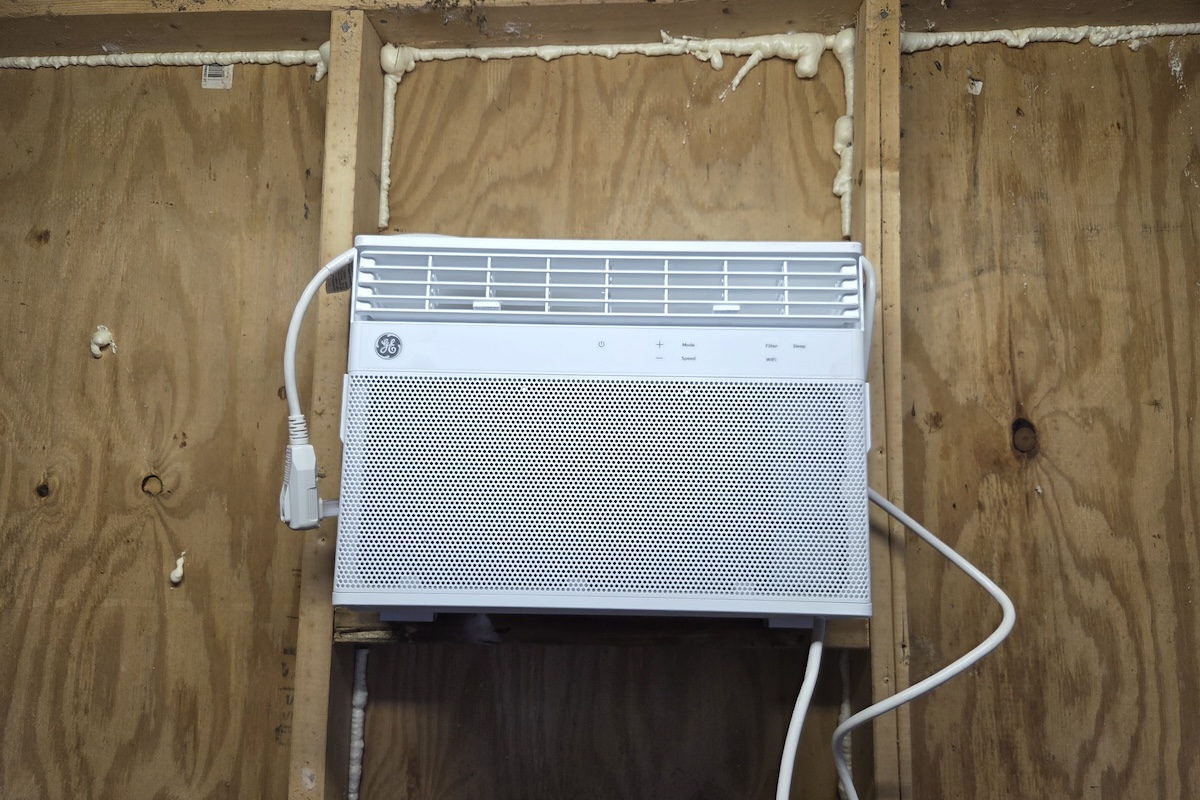
Since cold air sinks, you should install your window A/C unit towards the top of your cooler space. I cut a hole in the wall, screwed in a couple studs, and placed the A/C between those studs.
Step 5: Insulate, Insulate, Insulate
Once you’ve built the room and installed a door and A/C, it’s time to insulate the cooler.
I started by using canned spray foam insulation to fill the gaps around the A/C unit. This foam expands, so be sure none of it gets inside the A/C vents. Also, remember that you’ll need to remove the front grill of the unit to install the CoolBot device.
Per the recommendation of CoolBot staff, I installed the four-inch foam boards directly on the studs of the room. I cut each piece to fit, applied construction adhesive to the studs, and secured the boards with five-inch screws and washers. Be sure that any metal parts you use are rust-resistant so they won’t deteriorate if water condenses on them. Also, don’t forget to mark the location of the studs before you glue the boards to the wall. Don’t ask me how I know, but a stud finder can’t see through four inches of foam (at least, mine can’t).
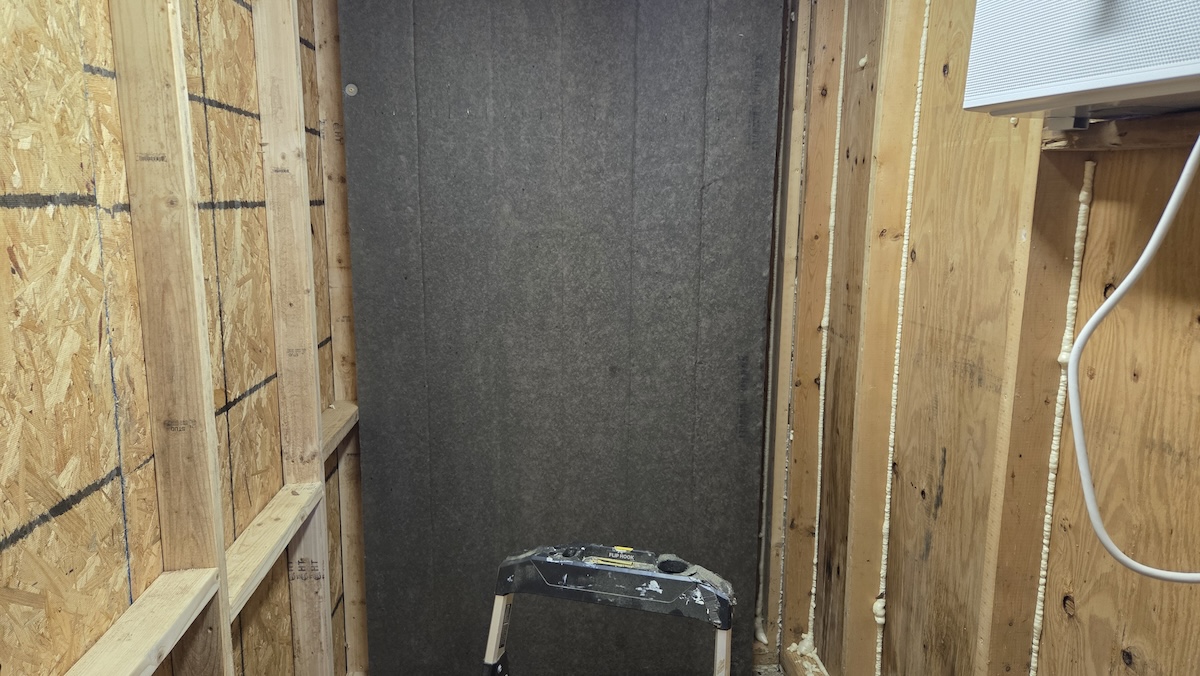
I used a battery-operated reciprocating saw to cut the boards to size. This worked pretty well, though it created a lot of dust. When you cut these boards, be sure to wear a mask, eye protection, and long sleeves and pants. I didn’t always do that, and I paid for it.
CoolBot recommends adding a vapor barrier to the warm side of the cooler to prevent condensation buildup. I probably should have done this. But I don’t plan on using the cooler more than a few weeks out of every year, and the foam boards were already fitted with a vapor barrier. So, I decided to skip this step.
After I installed the four-inch boards on the walls and ceiling of the cooler, I used spray foam to fill any gaps. My cuts were usually crooked, and as I mentioned previously, the cooler itself has a significant slope. But spray foam covers a multitude of sins, as the saying goes, so I was still confident that the cooler would be well sealed.
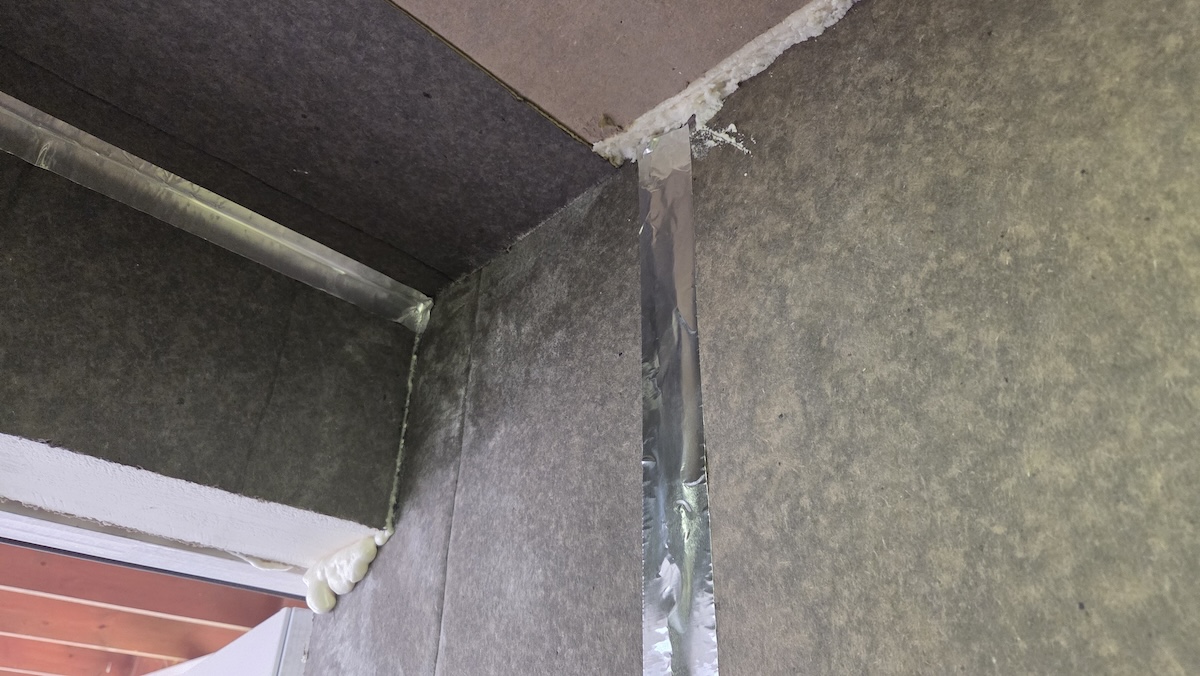
With the four-inch boards installed and sealed, I moved to the 1.5-inch aluminum-wrapped boards. I secured the boards with glue and layered them so they would cover all the seams between the four-inch boards. Installing them on the ceiling was tricky because I wasn’t using screws to secure them to the studs. I had to figure out a way to hold them in place long enough for the glue to set, which, as you can see, I did ingeniously.
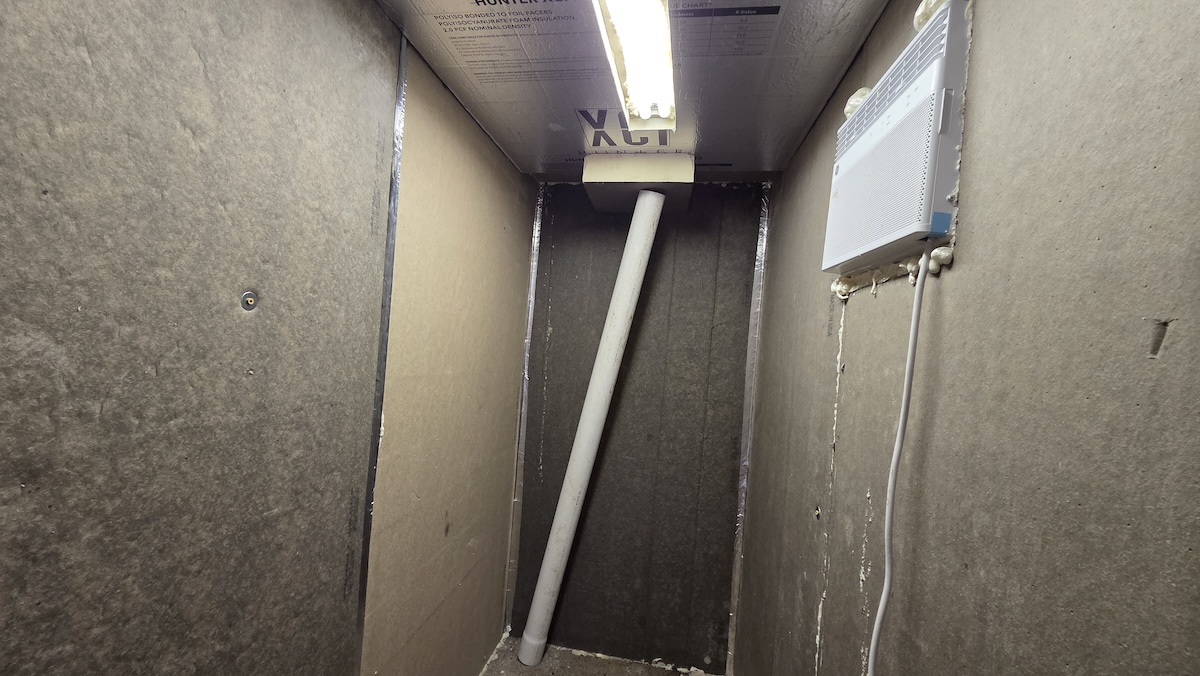
The process was tedious and messy, but ultimately not very difficult. Just be sure to measure carefully. If you decide to build a cooler space from scratch rather than repurpose an old space, you should consider making the dimensions fit these 4’x8’ boards. The less cutting, the better.
Once all the boards were set in place, I filled all the gaps with–you guessed it–spray foam. The seams that were too small for the foam to fill I covered with aluminum foil tape.
Step 6: Install the Hangers
I had hoped to find screw hooks long enough to get through 5.5 inches of insulation and into the joists in the ceiling. To my disappointment, hooks that long are special order situations. So, I decided to use lag bolts to secure a 2x4 to the ceiling. Then, I installed shorter screw eyes into that 2x4 along its length.
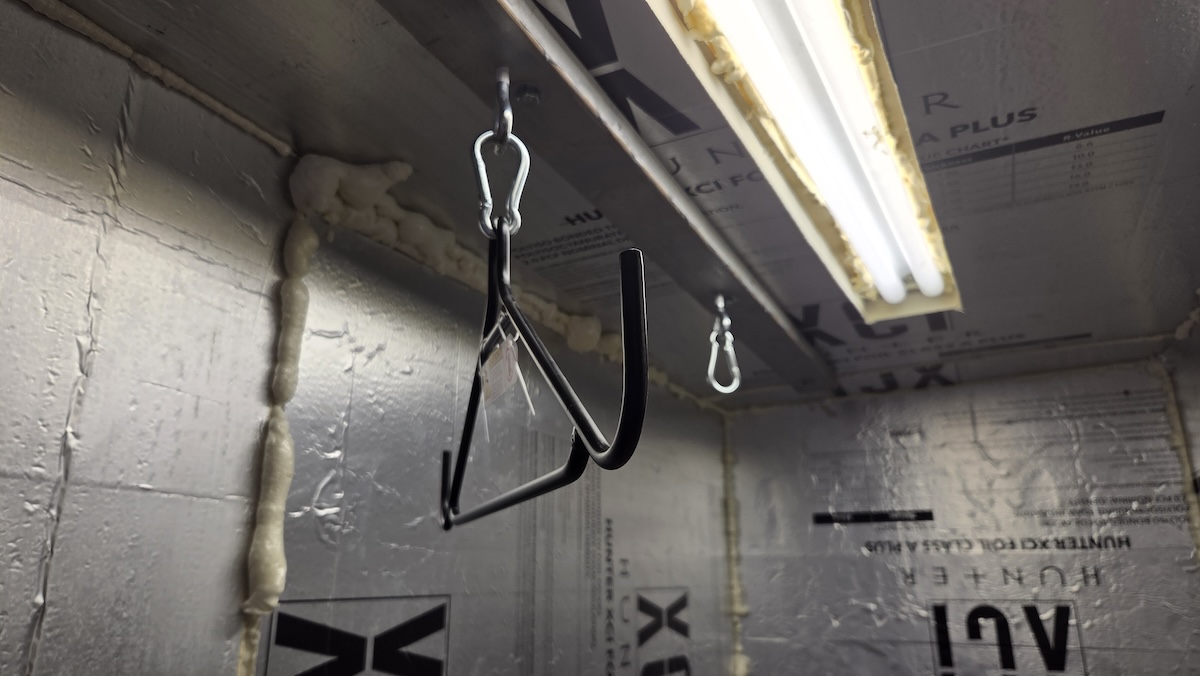
Make sure the screw eyes or hooks you buy can support the weight of the animals you hope to hang. Also, it helps to mark the location of the joists before you glue the boards to the ceiling. Otherwise, you have to measure distances from the top and hope you measured properly.
Step 7: Install the CoolBot
The CoolBot comes with detailed installation instructions, so I won’t repeat them here. I did want to note a few things that aren’t clear from the instructions.
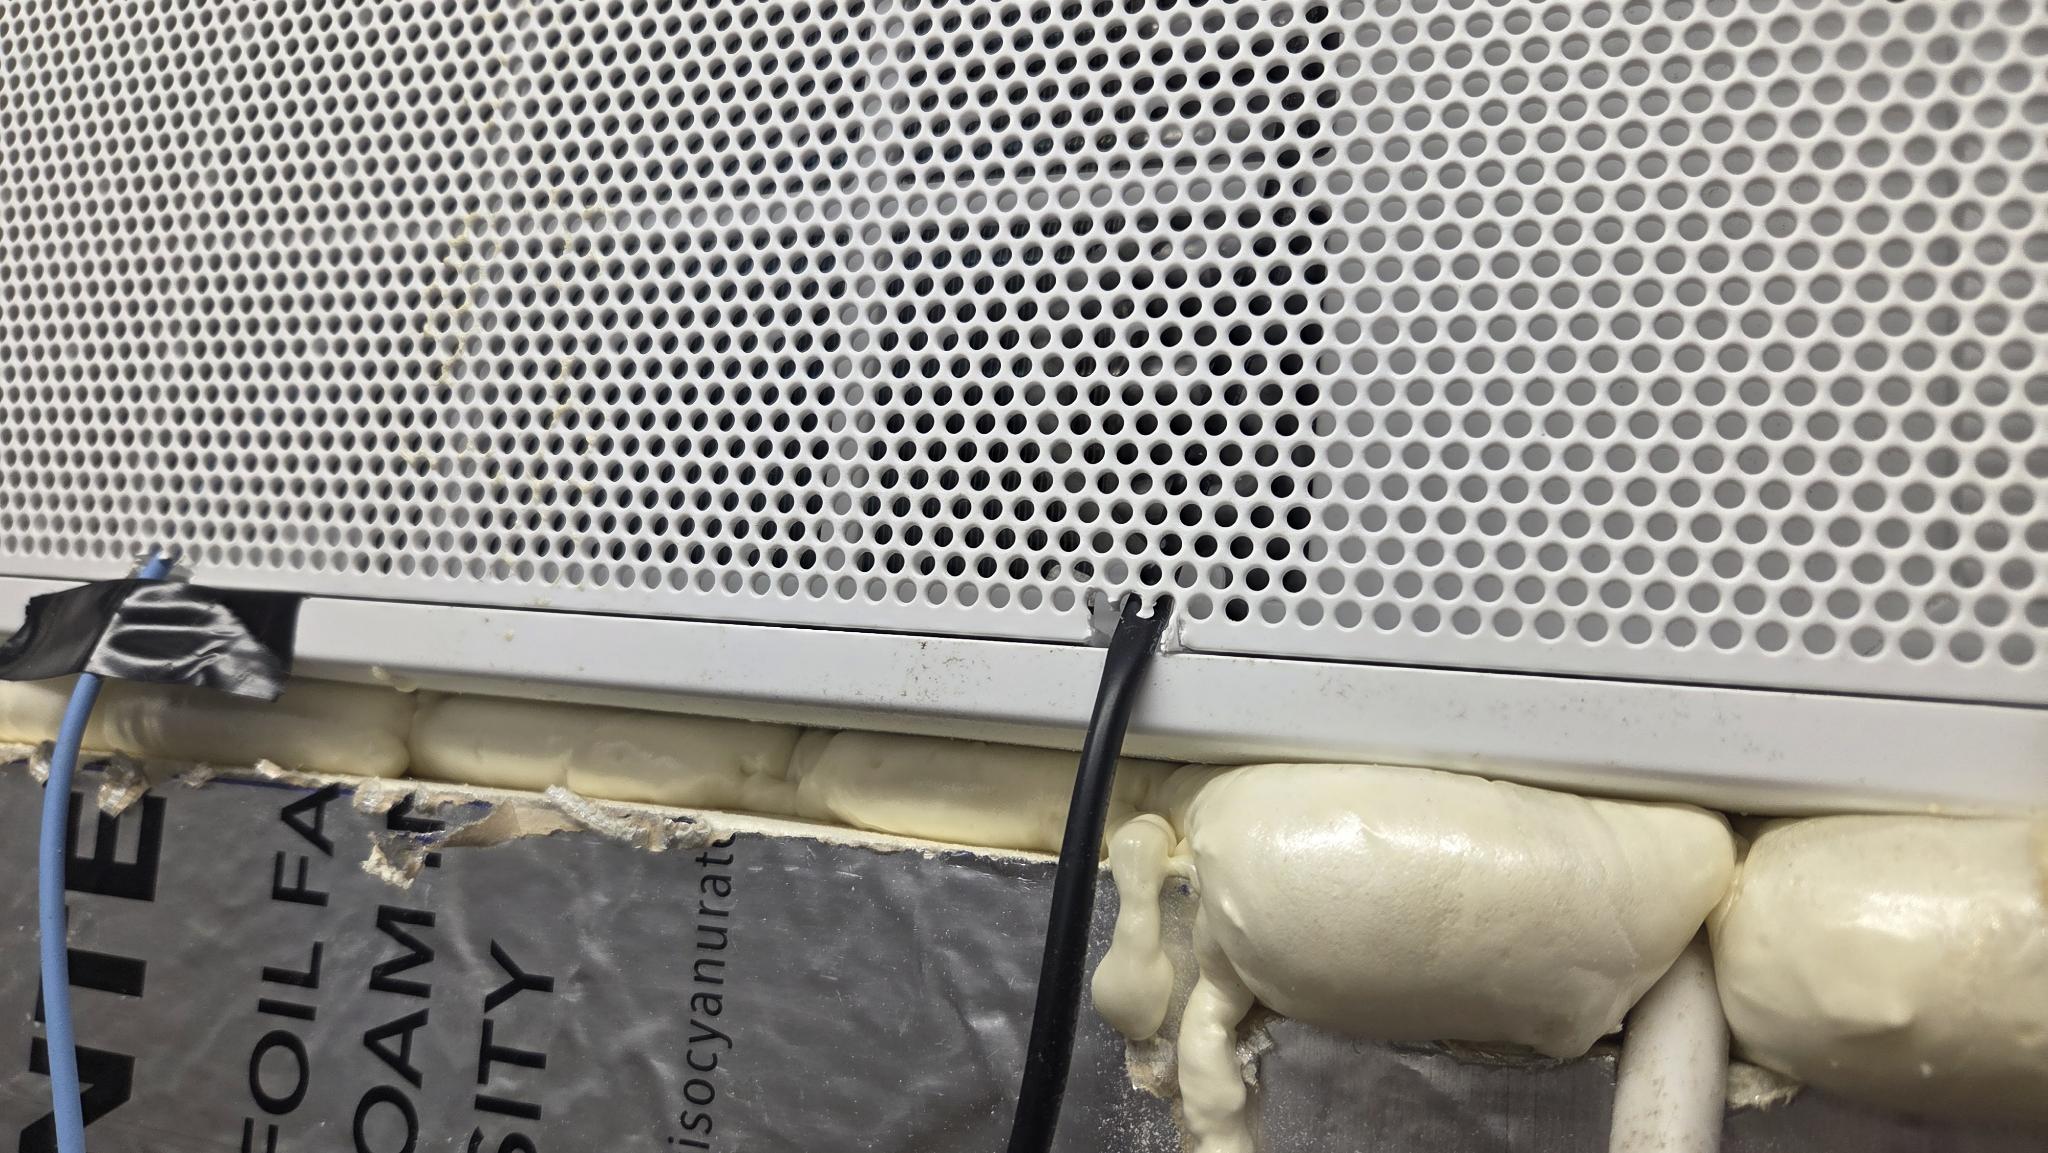
First, the front gate of your A/C unit might require some modification to fit the fin sensor and temperature sensor wires. I had to cut out a small portion near the bottom so they wouldn’t pinch those wires going in and out.
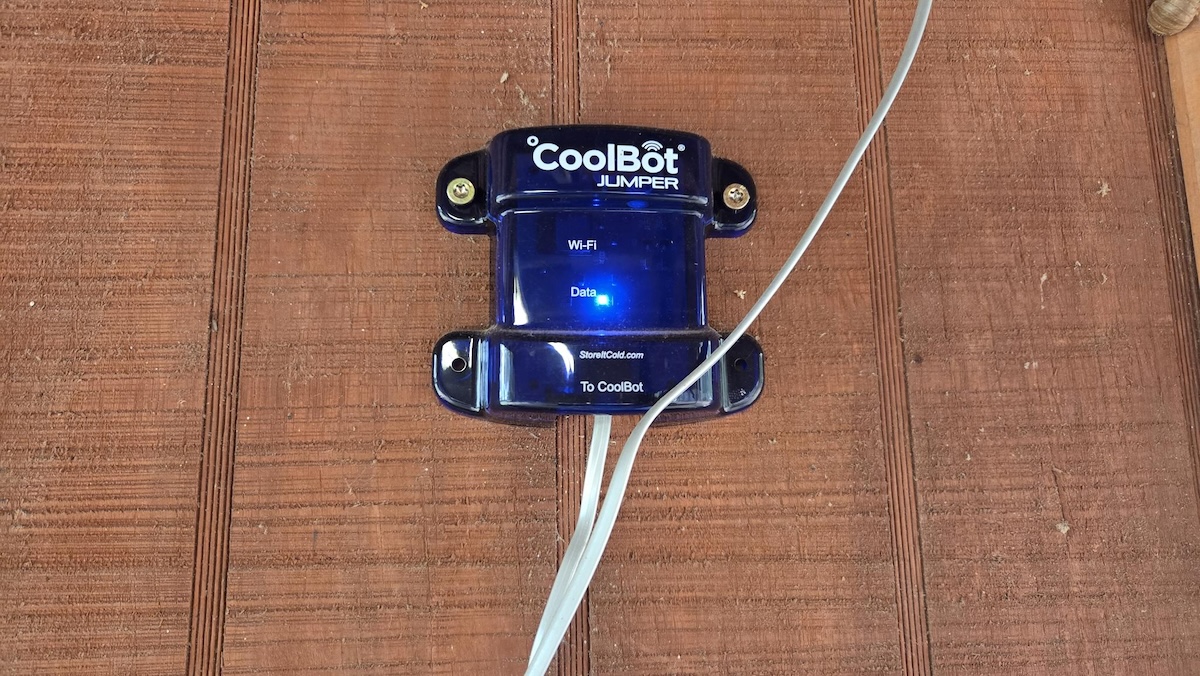
Second, if you get the CoolBot Pro model that connects to WiFi, you’ll have to run a data cable from the CoolBot to a jumper outside the cooler. The jumper has to be close enough to your WiFi router to pick up the signal. Before pulling the trigger on the more expensive Pro model, make sure your WiFi signal reaches the outer wall of your cooler.
Otherwise, installation is super simple. I affixed the CoolBot unit to the side of the cooler with two command strips. The heater wire connects to the A/C’s temperature sensor. One CoolBot sensor monitors the temperature of the fins to make sure they don’t freeze while the other hangs in the room and monitors the temperature in the cooler. Once it’s plugged in, you’re ready to rock.
Taking It for a Spin
I finished the cooler back in August, but I wasn’t able to really use it until a few weeks ago, when my son and I shot a pig not far from our house. We gutted and skinned the animal underneath the carport, carted it over to the cooler, and used a gambrel/pully system to hang it.
To start the system, I set the A/C as cool as it would go with the fan on “high” and Eco mode “off.” Then, I set the temperature to 38 degrees on the CoolBot app (you can also set it on the CoolBot itself), and let it do its thing.
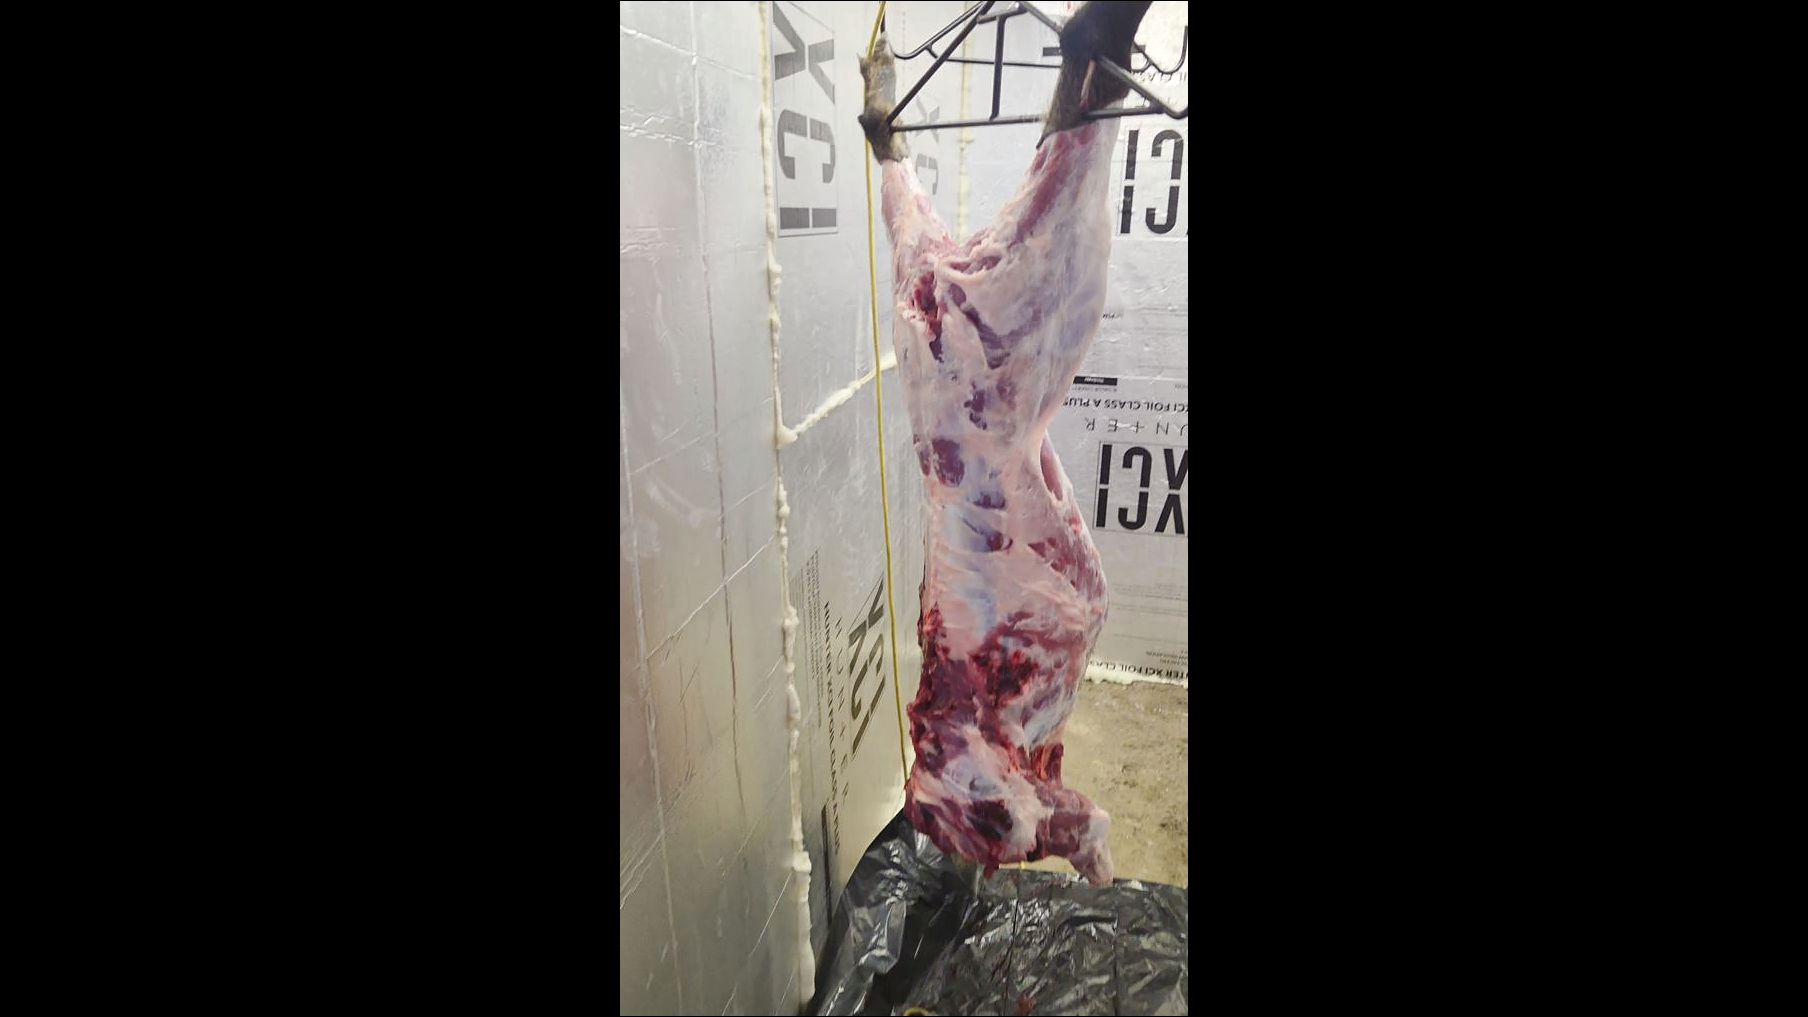
I had done a little testing prior to this, but I was once again amazed how quickly the cooler dropped to my target temp of 38 degrees. I expected to have to run it for hours to get cool, but even on a sunny, 90-degree day, it took less than 10 minutes.
The CoolBot app tracks the temperature in real time and sends an alert if the temp climbs above the ceiling you set. With the cooler set to 38 degrees, the temp rose and fell between 40 and 36 in 10-minute cycles. I was pleased with this performance, especially given the highs in the mid-90s most of that week.
I let the hog hang for a week before cutting it up. The meat was in great shape, cool and perfectly dry. I cut each quarter and butchered it in the kitchen, following Jesse Griffith’s recommendations in The Hog Book.
I’m most excited to smoke one of the hams. I’ve tried this in the past, but the meat has ended up too tough to eat. This time, I’m using Jesse’s recipe for city ham, which involves brining, smoking, and then baking in an oven. The hog was a relatively small female, so I think that this, combined with a week-long hang, will make the meat especially tender.
Things I Would Do Differently, and Improvements I Plan to Make
There are a few things I wish I’d done differently. I already mentioned using a level building and designing the structure to better accommodate 4’x8’ boards. I also would have used a smaller light fixture. The one I installed was already in the shed, so it made sense to use it. But it takes up a large percentage of the ceiling, so it took a lot of spray foam to seal it all the way around. If I could do it again, I would have used two single bulb fixtures.
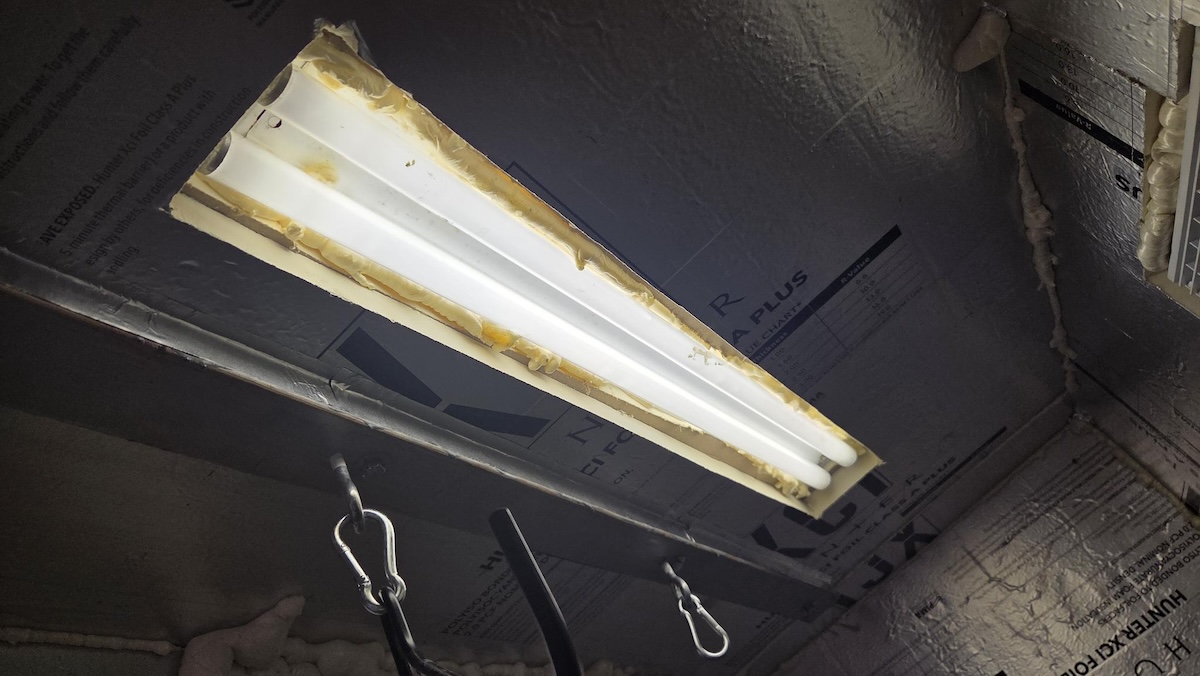
As for improvements, I plan to seal up the holes and cracks in the concrete floor. I don’t need to insulate it, but I think I’m losing some cold air through those crevices.
I also plan to better insulate the door to keep condensation from forming on the outside. East Texas is incredibly humid, so there may not be a way to prevent this entirely. But I think gluing one of the 1.5-inch aluminum covered boards would help a lot.
The Final Tally
Overall, I am extremely pleased with my new walk-in cooler. My family, friends, and colleagues are sick of me talking about it, but that’s just because they’re jealous.
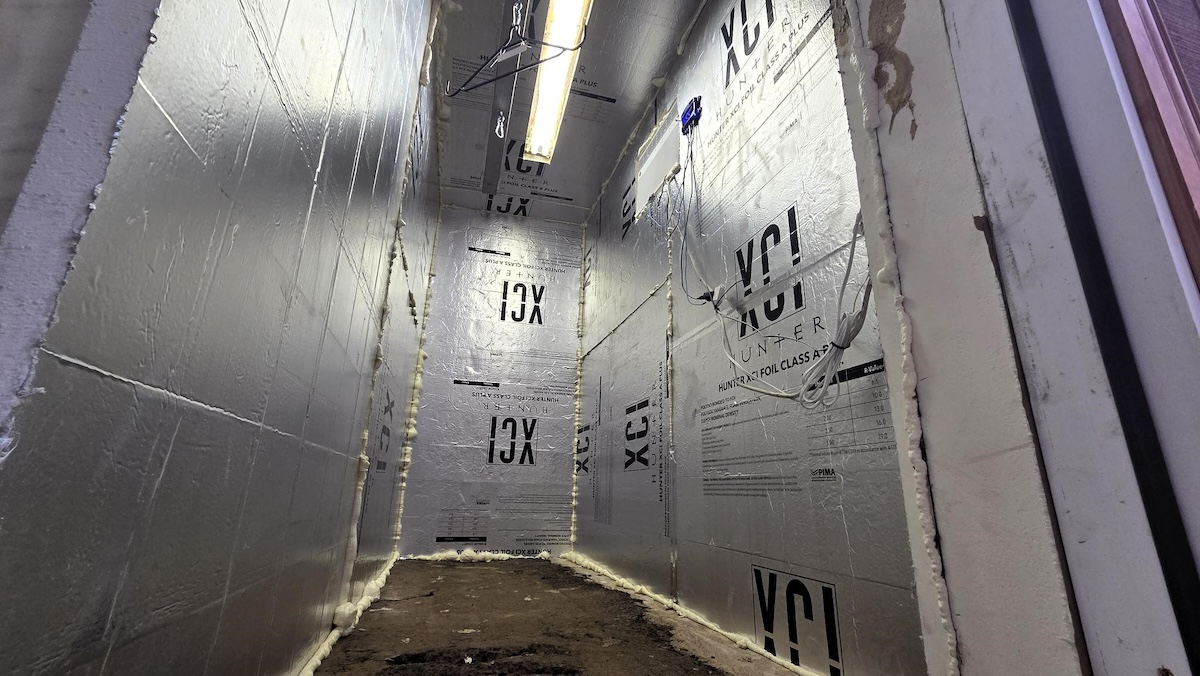
Here’s the final roundup of costs.
| Item | Cost |
| Foam board insulation (20 sheets, FB marketplace) | $150 |
| CoolBot Pro | $409 |
| GE 10,000 BTU A/C | $330 |
| Exterior door (FB marketplace) | $200 |
| Glue, spray foam, misc building supplies | $300 |
| Total Cost: | $1,409 |
Stay in the loop with The MeatEater Newsletter
Shop

Related
Gear
How I Built a Walk-In Cooler for Less than $1,500

Scout
Research Shows Buck Bedding Is Less Predictable Than You Think


