Popular searches
Articles
Series
Topics
Shop
Recipes
Gear Talk
Ep. 12: Knife Sharpening with Work Sharp

Play Episode
1h11m
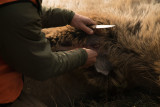
This week Jordan and Janis are joined by Steve Baker of WorkSharp to discuss knife sharpening. They discuss the tools needed, technique used, some problems you can run into and ultimately how to keep your knife sharp in the field. Also discussed this week is Jordan's guiding season, why you shouldn’t be scared to wash your outerwear, and Florida turkey hunting.
If you have a question you want to submit to Gear Talk for discussion, email geartalk@themeateater.com. Want to comment on this episode? Visit https://www.themeateater.com/listen/gear-talk and join the conversation.
Shop MeatEater Merch
00:00:13
Speaker 1: How do you everybody? Welcome to another episode of the gear Talk podcasts with me. As always, it's Jordan's Bud. Today's podcast, we're gonna be talking to knife sharpening expert Steve Baker from Work Sharp Sharpening Products. You probably know they make knife sharpening products, but you can also sharpen axes and broadheads and scissors, shovels, all kinds of stuff with them. But we're gonna talk how to sharpen your knives, how to keep that stuff in proper working order. But before we get to Steve, what's up, Jordan Man? Doing good? How's things in Bozeman? Oh? Man, It's been off and on winter, spring, winter spring, and today we're right back in winter. It's snowy and twenty five degrees and yeah, it's making people start talking about how much they're they're longing for warmer tims and sunny, springlike weather, which I kind of feel the same way too. But I also feel like I just need to stay in the groove and enjoy winter as it is, because I don't want to sit around bitch and complain and waiting for something to be coming down the pike. You know, we live in the West for a reason, you gotta be cool with it. Yeah, I'm in Nebraska right now helping on the family ranch and like kind of getting ready for Turkey season two. And it's yesterday it was about fifty five degrees. It's supposed to be about sixty today, and tomorrow is supposed to be snowing in twenty four so like here we are springtime, dude, and that snow is melting and it is like just a mess out there. Yeah, when it gets to be over thirty five round here too, my driveway is just an absolute just a muddy expletive hole. You know, you're getting ready for Turkey season, when do you start guiding? Um, we're gonna start the twenty fifth of March is when archery season opens, and I have a couple of guys coming in like a few days after the opener starts, so we'll kick it off with that, and then um, I've got a youth hunter like a week after that for the youth shotgun season, and then we'll start like April, I think like eighteenth orge so, and and we'll start running turkey hunters and we'll do that too through the first week of May, and then we'll call it good. What else have you been up to? What have I been up to? I went down to Florida and it's already started turkey season successfully. Yeah, Steve and I had been putting in for I think three years. This was our fourth year of applying, so we had three bonus points or preference points, however they do it in Florida built up and we drew a wildlife management area down there, so we hunted public but it was a limited public area, like there was only X amount of tag holders with us. But it was a short season. There's only four days, so after waiting four years and then they'll have only four days to get it done. And our scouting day gave us some false confidence because I heard probably five, maybe six different gobblers that morning. Some of them gobbled a half dozen times, one or two of them gobbled two or three dozen times, so pretty good. I was like, oh this is this is not going to be too hard. Well, it was a clear but warm morning and that day, and they've loved those conditions for goblin. The next four days were cloudy or it was mostly more like a fog bank that would build overnight and man those birds for whatever reason, you hear mixed reasons when you ask people why they do it. But they don't like to gobble when it's foggy. Some people say it's because they can't see the predators. Like it can be so foggy you can't barely see fifty sixty yards. So why sitting a tree and gobble and then hit the ground and gobble when you can't see fifty yards and all the predators around there. It could be just lurking waiting to get you. Right. The other thing is is that in that fog and that denser air, that maybe the gobble doesn't travel as far, and so they like it when it's clear, their gobble reaches out and hopefully more hens will come to them. Right. So I don't know the exact reasoning, but I can tell you that after a couple of days of very minimal gobbling, I started to get a little more nervous about my chance as they success. And you know, I'm not a huge like collector type person. I don't you know, getting slams or of any sort is not that important to me. I do like the fact that if you set up those goals, it's probably going to take it to a bunch of different places and go on, get to do cool different adventures. I think that's what's appealing to me about saying, oh, I'm gonna try to kill a turkey in fifty states. I don't need it because I want to say I kill a turkey fifty states. But I would like to say and go that I did that because I got to experience turkey hunting in fifty different states and fifty different locations, fifty different landscapes. It's cool, right. Anyways, So I did get aciola, which I think makes me some kind of a slam holder. I still got to get my Goulds turkey, which I think would that would give me like a royal slam or something like that. Anyways, I'm gonna do that next year with my buddy Ja in Mexico. But it was a sweet hump, it was. It's cool, you know, just being in country with palm trees and pal meadows um super sandy, you know, which is what makes the spurs on an ostiola super sharp, is that that ground is so soft they don't wear them down like our you know, western birds um and uh, you know, seeing gators around, seeing all kinds of different snakes, around. It's uh, it's not what you're used to turkey hunt, you know. And it was cool too. We got to hunt the WMA, which is very much just a back Florida back country experience, and then we killed there. By the day two we were tagged out and so after that we had access to a private ranch that's that's basically a cattle ranch in Florida. There's a lot of people don't know, but Florida is a mega beef produce and state from the center of the state is packed with cattle ranches and um, cattle pasture turkey hunting versus Florida back country turkey hunting way different, you know. Um yeah, because cattle pasture, it's like you can get close to where they're goblin and set up on the edge of a cattle pasture and set them up. Now, I say it was easy. We didn't kill one on the property. The property we hunted had gotten a lot of pressure that just a couple of days prior, and so the birds seem to be a little quiet and skittish and again foggy mornings. They weren't goblin. But all in all, great experience. Naziola turkey um I'm definitely gonna start putting in for these WMAs again and hopefully drawing a couple three four years and go and get to experience that again. So there were some turkeys that were walking through the yard here this morning, and there was like five hens and a tom just all walking together. And then I saw like a flock of like two three jakes the other day, and then there was like a flock of hens with no Tom's or Jakes with them or anything. And so seems to I don't know, like starting to see them wander around, which is good. I was really it sounds like the big, big winter flock is broken up, right, Yeah, yeah, for sure. And I was really worried about just how much snow they'd gotten and how hard it got. I was a little worried about our turkey how well they came out of it. But I've been seeing some so good. Yeah, it's weird to have already started Turkey season. And I mean I think I killed on like the fifth of March. But now I basically got to wait five weeks till I get to go on another turkey hunt. So I'm like fully in turkey mode. But now I have to revert back to lyon mode and I don't know, setting up rifles for bear season or something for you know, a month before I can get back into calling turkeys. Yeah, okay, we're going to do do a listener question, but we're actually going to discuss the feedback that Jordan got on a post that you made on Instagram. Tell me about the post and then tell me what you heard people saying about it. Yeah, so I made a real for me eater. We had just talked to Heidi from nick Wax about washing your outerwear, why it's important to wash your outerwear, and the amount of comments that we got on that that it was like overwhelmingly like people are scared to wash their outerwear because it costs so much and they're just afraid that something really bad is going to happen to it. There was one fellow that you know, pointed out that on First Light's website it says that you should it says don't wash them more than necessary, and but he was like, it's a little contradicting to you know, say that you should wash your gear and then the manufacturer actually says that you shouldn't. But it does say more than necessary. To me, that means if you go out and you're in it and you don't really get it dirty, you don't really get it smokey or whatever, come back and like put the thing in the closet. But if you get a bunch of dirt and stuff on it, like that dirt that gets caked on soaks up moisture, and like we talked about before, it can degrade some of that DWR and then it can kind of let your garment wet out or just soak up some of that moisture. So like washing that to get that off of it is good. And then also drying it like a low tumble dry like it says to do on like the Omen rain gear, it can kind of spread that DWR back out and like revitalize it in a way. So like it is good to wash your garments. Um maybe not like you wash underwear, but like you know, if it's dirty wear, but you don't, nobody uses their rain gear like they wear underwear. Yeah, exactly, it's just not you know, and if you are. Yeah, it's like I used to know fishing guides that worked in Alaska in the summers and they would buy a new super high or whether it was SIMS or Padagon or whatever gortex rain jacket every single season because what they did to that jacket, a lot of it had to do with the bug spray. We really can be bad for the membranes and the DWR. But between that and like those people wear those jackets every single day for a whole season, and you know what, Yeah, they just beat the living snot out of it. And you know that's how many days you get out of it. They'd have to get a next one the next year if you wanted a jacket that actually was going to keep you dry day in and day out and not wet out. But for most of us, like me included my rain gear most of the time rides around in my pack. You know, very rarely does it come out and get put on, So I can probably make it just washing it once twice a year. But like how do you was saying, there's a lot of other things that will get those garments dirty that'll prevent u the DWR from working and prevent the breathability of the garment. Uh, like the smoke thing I never knew of, you know, but just you know, any any kind of contaminant, sweat, dirt, whatever, like it's you're not doing yourself or your garment any favors by not washing it when it's been used and it's and it's dirty. Um, it's no different than like Kendall was talking about with the boots. Man, if you're if they're dirty and they're standing stuff in there, that stuff is rubbing you know, as you're wearing the garment or the pair of boots and wearing out your fabrics. You gotta get rid of that stuff and keep it clean if you want long life out of it. Yep, Yeah, totally agree. There was there's a lot of folks on there that were like, you know, this outerwear costs me a lot, and they were like scared to wash it. And I think that as long as you follow the recommendations by the manufacturer. There a lot of times on the tag of the garment, um, you know, like the omen is washing cold water and low tumble dry if you're gonna dry it m and as long as you follow that you should be good. Like if you're I think the drying thing especially freaks people out. But if you get a lot of high heats and stuff, like if you turn your dryer all the way up and you don't have it on like a low tumble. It can heat things up like on any clothing, you know, and get it like hot if it's like too hot. Um, so I don't know follow manufacturer directions, is my takeaway? Yep, exactly. Sweet. Well, we'll take a quick breather and when we come back, well we're gonna run through a scenario or if you forgot your knife at home with us Steve Baker from Work Sharp. All right, we're back and joined now by Steve Baker. Steve, let's get it out of the way. What makes you a knife sharpening expert? Ah, Well, I've been doing it for quite a while. I've been working for this company for work Sharp, since before it was work Sharp, So I've been here for twenty five years. We've been a sharpening company the entire time, and we started getting into knives quite a few years ago. And yeah, I've been like I said, I've been all over the company itself. I was a design engineer for quite a while, designed some of our products. So it's just understanding the geometry of a knife, what makes a good sharp knife, what applications you need, you know, different edges for that type of thing. And just understanding abrasives and the process of what's really happening to your blade as you're sharpening. But cool, I'm super looking forward to this. Yeah, and that's definitely enough credentials for me to call you a knife expert. So before we dive into sharpening your knife and some of the things that go along with that, we have a segment that we like to call what's the scenario And we're gonna throw this one at you, Steve. So you've departed for a hunt and you realize that you forgot your kiel kit, you forgot your knife. The nearest town is a smaller town, but it has like a Walmart type box store. That's your option. Like, what are you looking for for a knife when you go into a store like that. A few different things. One, I'm going to look for something that has a quality steal. I Am not going to buy, you know, house brand at one of these big box stores. The edge just isn't gonna last. So I'm gonna try to find something with a reputable name so I can get a decent edge. Then just look for the style of knife you're looking for. You know, if you're looking for a skinner let's see what they got there, but something with a for me, something with a decent belly to it, something in the three to four inch range, preferably a fixed blade, and then I'm going to look to see what they have as far as field sharpeners, So a manual system that I could throw in my pack with me, whether it's a small stone, it could be a natural or synthetic stone or a diamond stone, preferably somewhere in the eight hundred grit range, and then grab those and get back out of the field. Cool Lots to dive into with that, yeah, yeah, lots to dive into. But my question is, what if you go in there and everything you're looking at is just there's nothing. There's not a knife in there that's even forty dollars, and you're looking at all of it is just not looking that great because I feel like with the cheaper knives they're harder to sharpen. So is I almost thought that you're gonna say, if the if the options are super slim, just go buy yourself a drywall blade or utility knife and stick some stick some razors in there and do that. Yeah, that's an option. If the knives and if you don't like the knives that are there, But even if you have a one of the you know, like you said, you can't even find a knife that's forty bucks. They're just not great, not great tools. As long as you have a decent sharpener with you, you just have to end up sharpening a little more often. And then those knives usually have a softer steel, so they'll they'll sharpen easy. They just won't hold an edge for very long. So those knives actually will have a softer steel. Because I feel like I had a couple there was, you know, kind of name brand knives I thought back in the day, and I would just sit there and try and try and try to sharpen them, and they would never sharpen up. And I felt like that steel was just unbelievably hard. But you're saying that most of these cheaper knives will actually have a soft steel. Most will, most will there there are a couple brands out there that have a heat treat on their four forty steel that is absolutely amazing, and it is it's very tough. It's hard to sharpen U. So yeah, dependent on the knife you get. Some of those um lower end steels can be heat treated for quite well. But the majority of what you're going to find in these box stores, they're gonna be a fairly fairly soft steel. Little um that you'll be able to get a decent edge on. All right, let's get to it before we get into like, actually how to sharpen. I didn't have this in my notes, but you added it in your notes, and I think it's a great place to start. Is um, like knife safety. I know a lot of people listening. Oh really, knife safety? Come on, everybody knows, uh, cut towards your buddy, not your body. Um, that's a joke, dad, joke there. I tell my kids that. But I think it's important because there's more than one reason to keep a sharp knife. One is so that the tool works better for whatever you're applying it to, but two is for safety. So explain that part about knife safety, about how a sharp blade works into knife safety. Yeah, of course. Well, you're we're working on an oil you get something down, and you're working on a sharp blade. You make cuts much easier. So as your blade starts to get dull, you have to start applying more and more forced to it, and the more forced you apply to a blade, the less controller you really have over it, and if that knife jumps because you're putting a bunch of pressure on it, you just increase the chance of having an accident out in the field, and that can ruin a hut really really fast. Yeah, it's no joke. You know, you get a couple of miles into the backcountry and then all those possible accidents just compound, like the severity of the situation, if something bad like that happens exactly and listening to some of your guys's stories, some of your hunts, it's vitally important. I mean, if you're two three miles back in and even if it's not a you know, a deadly cut, you didn't hit the artery on the inside of your thigh, but you did, you know, cause some sort of injury to your leg. You still got a hike out of there, and then you know, once you get back to the truck, you know, how far away are you from getting any other kind of help? Now you got to drive, and it's just it's so much easier to just stop when you start feeling that knife get dull and you have to apply more pressure. Your cuts just aren't as clean. It's so much easier to have, you know, some sort of a field sharpener with you where you can stop, just take twenty thirty seconds, retouch it up, and then you can go back in and start working again. Steve, give me the pitch real quick. We kind of covered it, covered it, but didn't really get into it. Give me the pitch on why you prefer like one knife and a sharpener that you're gonna sharpen versus carrying around something like a havalon or an outdoor edge that have those more of a razor blade type night blade that's that's replaceable for me. There's a few different reasons. One, and some of the listeners may not like this, but I don't believe everybody packs those blades out of the woods with them. I think when they get dull, a lot of them are just getting pitched out there. And I'm not a big fan of doing that, and I've done very little with them. But she always hear the stories about the blades of breaking and some of the designs that I've seen in the past, and I know some of the manufacturers have improved it, but they're not easy to get in and out, even on a clean knife, and it just I don't know, they just they feel dangerous to me. And then compound that with you know, your part way through an elk or a bear and you get fat and blood and everything else on it, and trying to replace the blades, it just yeah, just it's more of an accident waiting to be waiting to happen. And if I have a sharpener and a knife, I can just keep maintaining it. I don't have to go back out and worry about how many of those little blades that might carry in my gonna break one. You know, a typical fixed blade to standard fixed blade is gonna be much stronger. Yeah, So for those reasons, and I can sharpen and I've got the tools to do it, So I'd much rather go that direction. Yeah, you're never gonna run out of steel and abrasive where where you could run out of replaceable blades. Yeah, definitely being a pickle. All right, Well let's get let's get into the actual sharpening, I think real quick, can we touch on just steels real quick? Um, there's a lot of different Like wh if you're looking at knives, there's like a ton of different steels and they all have like numbers, and it's hard to like get a grip, I think on what you're looking at if you're not used to looking at it. So can you just give a little overview of like, you know, carbon steels and like stainless steels, some steels that you'll see on um, some knives that you're probably looking at online. Sure, yeah, there's um. You're totally right. There's a huge variety of knife steals out there, and there's a rabbit hole you can climb down into and it just goes deep your more budget steels. You know, if you go into the big box stores or outdoor stores and see blister pack knives hanging on them, generally they're gonna have a lower end steel. You can still get a good edge on them. They're not going to last as long. Most steels you're gonna find anymore are going to be in the realm of being a stainless just not a lot of companies out there using just straight carbon steel anymore, just due to them, you know, the rusting and Steve started to interrupt real quick, But I feel like you got to explain what a blister pack knife is because I think I know after thinking about it for ten seconds. But you lost my attention because I had to think of what that is. So explain just real quick what a blister pack knife is. Yeah, thanks for that. There's a bunch of terminology we use. We just think everybody knows. Those will be the ones you see on the wall. They'll be like a card hanging there with a knife in a little plastic bubble or a little plastic blister that shows the knie NiFe off to you. Um. Not general are the ones you're going to pick up and I'm you know, in a nice box or seeing them in the cases. Um, and a lot of these are you know, they'll be your Chinese made knives, so they're going to be in the other sometimes down to five dollars, sometimes up to thirty or forty knives. You got it. More of a clamshell packaging, right, So the blister pack refers to the type of packaging where it's like a all kind of in a molded piece of plastic. There's a cardboard piece in there that is the background, and then you'll have whatever item it could be a knife. Um. A lot of broadheads are sold the same way. I mean, there's a gazillions. A lot of Phelps game calls are you know, package the same way any game calls for that matter. But that's blister packaging, all right. Sorry, So you're you're talking about the types of steals. Yeah, so a lot of those, you know, you're gonna be in like your eight c R O um MOV type steels, and they're going to be much softer. The edges will roll on them. You can get a good sharp edge on them, but the edge is going to roll over them. Are blunt a little bit, you know, quite a bit earlier than say, if you get into some of the higher end knives where you're getting it up into like an S thirty v S ninety v L Max. There's a lot of really good steals out there, and over the last few years, knife companies have really been pushing the limits on just the durability of the steels, the toughness of them, the edge retention, abrasion resistance, the corrosion resistance. So there's a lot of knives out there. So here's my opinion. One, you can go way too far on one end and end up of a steel that doesn't really work that well for the types of hunting that you guys are doing, and you're trying to break down animals, then there's that sweet spot in the middle, and in my opinion, there's another end over at the far end where you take it too far. Now you're ending up with these knives that are so abrasion resistance and they hold an edge so well that if you do let them go too far and they dull, they're really difficult to sharpen out in the field and they're going to take a lot more time. So there's kind of this sweet spot in the middle where I like to stay. Let's say, from my own opinion my hunting knives, I like to carry either an S thirty V or an S ninety V. Typically S thirty V. It's just a good all around steel for as far as toughness, edge retension and corrosion resistance, and it's easy to do touch ups in the field, but you still get good edge retension out of it. Awesome and our most like like for those two steals. Would you say that most you know, American made knife manufacturers are using those two steals or is there another one that some other company is going to say, well, hold on, we use you know, XV one to fifteen and it's just as good, or is there not? That's not even a thing like. Those are the two main ones that all these companies are using. S thirty V is pretty popular, but you're company. The steels are all over the place. Knife companies are using all kinds of stuff, So S ninety V you're not going to find that in every manufacturer. M S thirty v is pretty popular, but you're probably not going to find that in every manufacturer either, but you'll find something along those, you know, an equivalent of those. Yep, I gathered up a few steels that knives are using. The r Galli carbon knife is an S thirty five VN. That's a stainless that's Montana knife is using like a few different ones. Um, but they're using a fifty two one hundred ball bearing steel on some of theirs. Yeah, that's UM carbon steel. That's a that's a great one. Yeah. Um. And then bench may's the last one. They're using U S thirty V S ninety V. And then they have a CPM one fifty four in there as well. Yeah, that was a fairly new one for them they had. Um. Yeah, they've used all kinds of steels, but any one of those is going to work great. Um. I have one of the Montana Knife Company um black Foots in the fifty two one, and it's yeah, it sharpens up fine in a field. It's more it's more on the carbon steel side of it, So with it being coated, you're good. But you just got to make sure that you keep the knife clean, clean and dry so you don't get any kind of corrosion on it. And they also do some I believe it's in I think it's magnetic. Yeah, yeah, that's another one. It's a it's a great steel, good edge at tension. It is going to be harder to sharpen in the field. But if you're carrying a field sharpener with you that has diamond embraces, then you can cut any one of those super steels pretty well. Well that's all I had for pre sharpening. You want to dive into the what Yannie brought up? A knife sharpening is not magic. Yeah, it's one of the things. I just like to bring that up because you always hear I've done shows, I've talked to thousands of different people, and one of the common stories we hear is like man, I've never been able to sharpen a knife it all. It's just been terrible. But man, my grandfather, you had this little stone, he'd spit on, you'd rub a knife on there, and you hear all these old time stories and it's it's just it's not magic, you know. It's the three things I tell people that you need is you need repeatability, you need consistency, and you need patients. Repeatability I put towards like our sharpeners from work sharp Everything we do has some sort of an angle guide on it to help you maintain the correct angle wire sharpening, so you get repeatability out of that. The consistency comes from you using the tool, whichever tool you have in your pocket. It could be grandpa's old stone, just as long as you are consistent holding the angle and the pressures as you're using it. And then patients just comes from you have to put in the amount of work to get back to get those two edges back to sharp. And it's not always. You know, you can't just pick it up and two or three strokes on each side and think it's going to be a razor again. And that's where a lot of people fail. Also, is there. It's like, you know, I worked on this thing for ten minutes and it's not a sharp I don't know what I'm doing wrong. It's like, well, most of the time you just need to spend a little bit more time on it. Anybody can sharpen it. I've taught hundreds of people out of sharpen. Yeah. For me personally, the only thing that takes less than an hour, maybe not an hour, but less than thirty minutes is if I'm just touching up a blade with my ceramic rod or a steal of some sort. And most of the time that's in the kitchen. But you know, like a lot of like the field sharpener I carry from you guys, it has a little ceramic rod on it too, and I think we'll get to that. But using that more often than less often keeps you at that super sharp level where then you don't have to put all the effort into, you know, a long sharpening session later. Yeah, and that's exactly it. We always always push maintenance. As soon as you think that knife's getting dull, just stop and give it a few strokes on the ceramic. You know, I keep a ceramic ground in my kitchen before my wife and I cook dinner every night, we take whatever knife we're going to use and we'll do you know, three four or five strokes per side on the knife on a ceramic, and that knife is always just just blistering sharp. So just keep them sharp and you don't have to go back and do that heavy that heavy work again. Okay, Well, let's go to like what makes the blade dull? Like what does that look like? Jen, There's a few different things that can happen. You can get an edge of the will roll over, so you have this sharp apex, you know, where those two surfaces come together and they create this very sharp edge. Well, sometimes you can get that edge and it'll start to roll over a little bit, so it just kind of becomes blunt. You know, a lot of times you can you know, if you're working on something you slip, you hit a rock, or you hit a bone or something, you could actually put a flat spot on there, which is going to start to dull it a lot of times if you just use it for too long. It's just a brasive you know, you're you're cutting into say, you know, bare deer, elk whatever, you know, these animals on the ground they're filthy, you're starting to cut into and you're going with your hair and stuff. It's all abrasive. So you can actually take an edge off fairly quick, but that's generally or you're you know, you're start picking up some chipping or something on it. And a good way to check is you can actually, you know, to get some light above you, whether it's sun or a light inside or whatever. Just stare straight down, look right down at the cutting edge of your knife. If you see reflection on that cutting edge shining light back at you, that's where you have some damage and it needs some attention. Oh, I see, because instead of looking at the apex of a really fine point, you are now looking at them like a like a flatter edge of metal that's reflecting the light. Is that what you're saying? That That is exactly it? Yeah, because the apex, you know, it's going to be infinitely small on a sharp edge, so it's not going to reflect light back at you. But as soon as you get a flat spot on there, like you're saying, it'll start to reflect light back at you. You can see exactly where the damage is. Do you correct that the same way that you do a dull knife when you're sharpening, Yes, yeah, the process is the same. Yeah, let's dive into that. Yeah, So what's happening when you're sharpening. You're cutting edge has two surfaces, one on each side, right, So now we want those two surfaces to meet in the middle of the knife. And when those two surfaces meet, that's what's going to create that apex, right, that sharp edge because right now you have those two surfaces. On a dull knife, you have those two surfaces, and in between where they would meet, you have this rounded over, flatted, blunt edge, so it's not sharp. So what we're gonna do is on each side of that, you're going to remove material from one side and then you're going to move a little bit of material from the other side. You're just gonna keep moving those in until they meet in the center. And what happens when you finally get those edges to meet in the centers you create what we call a burr and spell bu r R just a burr. So, as you're sharpening, whatever side of the knife is contacting the abraces you're using as you make passes along there, when you hit that apex, it's going to start forcing material to the other side of the knife. So and you want this, you have to create a burr in order to create a sharp knife, because that's your indication that you've reached the apex of that cutting edge. What that feels like is if you push your finger going away from the edge, slide it down the face of the knife or the side of the knife, and go over the top of the edge going away from it, you'll feel, for lack of a better term, a burr or a kind of a wire edge as it's called sometimes, and it feels really rough, and you want to be able to feel that all the way from the heel all the way up to the tip for the full length of the knife. Once you have that, now we want to go to the other side of the knife and we're going to do that same process, and we're going to build another burr, so the original bird would get ground off, and now you're going to create a burr on the other side. Once you have that from heel to tip, we know we're going to get a sharp knife. From there, we can move on to finer abrasives. So Jannis, the sharpening that you're carrying, you start on the course diamond, do a few passes on one side, check for a burr, do a few passes on the other side, and once we get that burr, we can go to the fine diamond. And now we just start alternating strokes. You'll do one on you know, say the right side of your knife, and then one on the left side of your knife, and just keep going back and forth that And what we're doing there is now we're we're we're knocking that bird down and we're refining that edge. So we're just going to keep going to finer abrasives. So we'll do say five to six strokes on the fine diamond, and then over to that ceramic cone that you're talking about, and using very light strokes, we'll come back in. We'll just keep alternating and do a few strokes per side on that and using very light pressure, especially on the ceramic. Just keep lighting your pressure as you go along, as you get close to being done, and you'll end up with a just a great sharp knife. Okay, I got a lot of questions, Yeah, me too. Go ahead, Yuni, you can start just the ceramic, like why why do you need to go to a ceramic after you've gone to like your fine diamond. It's the great, great question. You don't have to. You know. The nice thing about having a sharpening with multiple abrasives on there is you can you can create different styles of edges. One of my favorite edges that I like is I'll go from one hundred and twenty grip on one of our flexible abrasive sharpeners like our can onion bottle um, I'll go from one hundred and twenty grit to twelve thousand grip because I like an edge that has a good tooth to it. So if you wanted to say stop at the fine diamond, you may still have a little bit of burr on there, but it basically is creating a really toothy edge for you, which will cut fine. It's just not as refined as when you come off of the ceramic. And that's just my preference. I like to go to the ceramic and get a little bit finer edge on it. But you don't. You don't have to, Okay, Um, I was gonna talk say about the burr. It seems like a lot of times when I'm looking for that burr, when when you're, like you said, working, I usually just use my thumb and I come from the main body of the blade, I guess, and towards the sharp edge, you'll kind of feel it catching on your skin and it will be rough. But if you then flip to the other side, your finger finger can roll right across that edge without feeling that sort of catching its Is that a good way to describe it. That's a perfect way to describe it. Yeah, because that one side and you push the burr opposite side of where the abrasive was, you're gonna feel like catching your skin and then yeah, the other side should be nice and smooth, right, But yeah, that's a that's exactly what we're looking for. Another thing that I think that it has helped me is that I think before I learned about how the burr works, because a lot of times, even in the even in the manuals of how do you start up in the knife, it'll be like twenty strokes at with this particular grid and then ten strokes with this particular grit. But until you've created the burr, you can't really be going back and forth, right, So it might take you thirty or fifty strokes on one side until you've created that burr correct that's very correct. Yeah, generally when you read those when it tells you do ten strokes or twenty strokes or ten strokes, when they're giving you a stroke count, it's just it's really generalized. Yeah, so you're you're exactly right. It couldn't take up to thirty forty fifty strokes. And this is where where we're talking about earlier or I said we needed patients, that's exactly where the patience comes in. You've got to be able to create that burr. My preferred method for doing it is I'll do five to ten strokes on the first side and check if I don't have a BERR, I'll do five to ten strokes on the other side, and then I'll go back to the first side and do it again. Rather than doing all the work on one side and trying to get that edge all the way over and then starting again on the other side. Improve and it's actually faster to do, you know, five to ten strokes on the first side. If you don't have a BERR, do five to ten on the other side, and then go back to the first side. Just keep following that process until that first side you get the BERR. Then you kind of repeat what we've been doing for the second side. And that's because you're taking material off of both sides, and so that means that you're going to get to the fine tip or get to the berr faster than if you're just doing one side. Yes, yeah, you got it. Yeah, because you're bringing both of those in, you know, a little bit each time, you know, one on the right side, one on the left side. You're bringing those into the center sooner, you know, you know, together, rather than pushing one that may go past center a little bit and then you got to bring it back. So yeah, it will be faster. Then you'll remove less material from your knife, which I'm not a big fan of removing any more material from my knives than I have to. Yeah, but you know what I figure if you sharpen your knife so much that you actually like decrease the width of your blade, and you're doing a lot of hunting and a lot of cutting or a lot of something, and so it means you have a life well lived. All right, let's go here. Tell me why why does everybody think that they have to apply a lot of pressure to from their blade to their stone when they're sharpening and then tell me why that doesn't work and why it's actually the opposite. That's a that's a great question too. We talk about that a lot at the shows we go to. People think the harder you press, the faster it's going to remove material, and the more material you'll remove, so they think they're going to get to a sharp edge master, which is not the case any of your abrasives. Let them do the work. You know, they can only cut so deep. You can put you know, light pressure on it, or you can put really heavy pressure on it. You're not going to get there any faster. M What really what ends up happening is like on a diamond plate or a flexible brace of that's a belt, the more pressure you put in there, those those grains are held on. So on a belt they're held on. The abrasive grains are held on with what's called a size coat and that's what it hears them and holds them onto the belt. And with a diamond plate, nothing sticks to diamonds. You have to mechanically hold those on through an electro plating process. So you're using nickel to physically hold onto those diamond particles. And the harder you press the more those diamond particles or those grains on on the flexible brace of that you're plucking out of the size coat or out of the nickel. So really, by applying more pressure, you're shortening the life of your abrasives. You're gonna start taking those diamond particles out of there. So use a moderate pressure. You know, if you if you have a diamond stone in front of you or using a field sharpener, if you can see your fingernails, your fingertips turning white because you're applying pressure it's too much, you know, back off a little bit. Let the abrasives do the work. And this also goes back to the safety we're talking about earlier. The more force you're applying to that, the less control you have over that knife, you know, and you're making strokes across the diamond, you know, towards yourself and then away from yourself, and you got your hands close. You want to have good control over that. So light pressure, let the let the abrasives do their job, all right, So adding pressure is not going to necessarily do anything negative to your knife blade, but you are wearing down your sharpener faster, and you're being unsafe. Yes, I would agree with that. All right, we definitely got to go over this one. And that's the sharp the sharpie trick for helping you sharpen your knife. Yeah. One of the biggest questions we get is people come out and they're looking it's like, what, you know, what angle do I sharpen my knife? Especially when they're looking at ours. We have all these different angles. You know, we can sharpen anything from fifteen to thirty degrees on psalms. Some of them are ten, you know, twenty to twenty five, some are ten to thirty five. People look at you like a deer in the headlights, like what angle should I sharpen this? That? You know? What angle is my knife? Um, so there's a trick out there. You take a sharpie. Doesn't have to be a sharpie, it's just what we call it's a sharpie trick. But just take any kind of a marker and pick that and color the the entire cutting edge of your knife from heel to tip, So just the cutting edge, do it on both sides and now go and that cutting edge is gonna be what like a like an eighth of an inch right most knives, that's how much you're looking to color. Yeah, even at eighth of an end should be pretty tall. Okay, yeah, yeah, more around a sixteenth or maybe even a little bit less, depending on the knife. Like the Montana Knife Company, they're so thin, they're down by the cutting edge. They're probably only thirty to forty thousands tall, So it's pretty small. Oh wow, but you're right, it's a very small edge, just the cutting edge. Okay, so color that with your marker. Go to your fine abrasive because what we're doing is we're trying to find the angle. So we really don't want to remove a lot of material here. We're just trying to remove enough to take that sharpie marker off of it. So go to your fine abrasive. Take your best guess where you think you're holding. You know what your angle is, Make a couple of light strokes across the abrasive holding that angle, and then when you look at your your cutting edge, part of that sharpie marker is going to be gone. Now you just ground it off. So if the only thing, the only place that the sharpie marker is gone is on the actual cutting edge right out by that apex, then you're holding your knife at a too steep of an angle. You need to drop the back end of that knife down a little bit to a shallower angle. And if you're only if you only removed material from the heel edge of that cutting edge, then your knife is laying down too flat. You need to go to a more to a higher angle. So try that, make the adjustment, take another swipe out it, And what you're really looking for is within a couple of strokes, you're looking down and all of the sharpie marker is gone from the heel of that cutting edge to the actual apex and that cutting edge, and that will give you an idea of where you're at, and then you know you can use guides or whatever whatever you need to use to be able to be consistent with that afterwards. Yeah, Jordan, have you ever done that with the sharpie? Oh? Yeah, I have. That's about the only way that I can do it. It seems like I just don't sharpen as much as um I probably should to be consistent with my angle. But edge angle is like probably the most question that I got asked when I was asking people about this podcast and that we were going to do it. Everybody wanted to know about edge angle. Like, which which angle they should use? Jordan, Yeah, yeah, pretty much, wish it edge angle they should sharpen it at. And that kind of led me to a question of like, okay, well, if you have a knife that's like twenty degrees, can you change that definitely? And I do on most of my knives. Um, this may not be a popular opinion. It's a lot of people, but I think edge angle is a bit overdone. I don't think it is as as important as a lot of people will tell you that it is. I can sharpen take two knives that are dull. Take two exact same knife, make them dull, let you use them for a while. And I could sharpen one at seventeen degrees and one at twenty degrees. And I bet you couldn't tell me which which one is which, because you're going from a dull knife to a sharp knife. So me, for me personally, I have different styles and eyes. All my hunting knives I do at twenty degrees. That way, I know what all of them are, regardless of what the factory ground them at. I regrind all my hunting knives at twenty degrees. I have some thicker German style kitchen knives. I keep all those at twenty degrees. I has some Japanese knives. They're a harder material, they're much thinner, so I keep them at seventeen degrees. I have my camp knives. I typically keep at twenty five degrees, so I just know what those are. I don't really put a lot of stock into you know, this particular knife has to be at seventeen degrees because I know at twenty degree edge on my honey knife is going to cut fantastic. And it also think about how the geometry of an edge thinner. The lower the angle you go, the thinner that edge is out by the cutting edge. So given it a couple extra degrees, you know, going from a seventeen and held grind mind back to a twenty leaves me a little bit more little extra material behind that cutting edge to make it a little bit more durable. Also, and to your point in Jordan, yes you can change it. So if you had a brand new let's just say bench made Steve Country, that's one of my favorites, had been camera on one of those for a long time. Now, I don't even know. I can't tell it, do you know? Off the top of your head. What angle it comes at? Bench Made hand sharpens everything and they shoot for like around a sixteen to twenty degree at edge angle and they have now there I think it's called the select edge where they're grinding everything to a fourteen degree per side, which is way down there, extremely shallow. Okay, just a quick Google search. Bench Maid's answer is our knife blades leave the factory with the thirty to thirty five degree include angle. What does that mean? So it's a different, two different ways of looking at your edge angle. You can do it everything we do. When you look at our tools, we do everything. We talk about them as per side. So we say you're sharpening at twenty degrees, that's twenty degrees per side inclusive. You would add those two together and that's a forty degrees. So they're saying thirty to thirty five. So what they're really saying is fifteen to seven, fifteen to seventeen, fifteen to seventeen and a half degrees per side. Okay. So my question is if you get a brand new steep country and it's it's it's ends up being at seventeen, but you're like, I'm gonna I'm gonna go to twenty, Like what tool would you use? And how long would it take you to get there? But it's the nice thing about going to them. A steeper angle is think about a seventeen degree is very shallow. If you go to twenty, it's a little bit more obtuse, so it's a higher angle. When I go to twenty, I reached the cutting edge immediately because I'm going to a higher, higher angle. If you try to go the other direction, you have to ground down the heel of that cutting edge until you get down, until you until you get that entire surface to that angle. So I don't know, you know, I would use either our One of my favorites is our ken. I need edition knife and tool sharpener with a blade grinding attachment on it. I could resharpen a knife from seventeen to twenty and I don't know about a minute. Oh really, yes, if I was to do it on the guided field sharpener like what you're carrying, it's still it's going to take me, I don't know, maybe two minutes, okay, just because you're going to the because you're getting to the cutting edge immediately. If it's going into other direction, you're going from a knob to say, if you're at a twenty and you want to go to a seventeen, it's going to take a little bit longer, but still even on the GFS, I'm sorry, the guided field sharpener with the diamond eBrace was on there on that steep countries and s thirty v four to five minutes, I could have you a really sharp knife and decrease in the angle. Wow, I feel like I must be really slow at sharpening knives. Just it takes practice. I've been doing this a long time. Yeah, going too the sharpeners themselves, can you like give a little run through on like your powered options versus like your pull through options versus you know, like the guided field sharpener. Sure. Yeah, I'm gonna start with the powered we have for outdoor knives. We have three different powered sharpeners. We have ones called our Combo comes with a single belt and sharpens to a single angle of twenty five degrees per side, and then it has a ceramic rod on the side that has angle guides on it also for doing the final touch up. Then from there we go up into our knife and tool sharpener, which is one of the original sharpeners that we designed. The guide on that can be adjusted from twenty to twenty five degrees, So if you have filet knives and kitchen knives that type of thing, you can do them at twenty degrees, or your pocket knives, if you have ones with better steel and you want that thinner angle, you can do them at twenty and then has the ability to flip a little lever on there and it moves the guides over to twenty five if you prefer twenty five degree angle. That one's coupled two different speeds. It's really easy to use. You place your knife in the guide, you lean it up against a guide. That's what holds your angle for you, so you don't have to try to hold it to a specific angle. And then our top end is the ken Onion addition knife and tool sharpener. This one has an adjustable guide or you can adjust your edge angles from fifteen to thirty degrees by turning a knob on the back and it moves the guides to the correct position for you. That one also has variable speed, so you can adjust the speed tom or you're comfortable sharpening and for the task at hand, if you have a lot of work to do, you can turn the speed up, try to get the work done a little bit faster. Yeah, who would you recommend a powered option too? Like just for an at home or if you like to sharpen a little quicker, or like what's you know, what's your pitch for going powered? You know a lot of them. It's fun because we go to these shows and we actually work through with people. It's like, you know, what do you want to do? What you know, what kind of knives are you doing? For the people to just say I just want a sharp knife. I don't want to have to worry about what a brace was do you use? I don't have to worry about angles. I'll steer them towards like the KTS. You know, it's just got two angles, a couple different abrasives, super easy. But these are people that don't you know they're they're sharpening at home obviously because they're not You're not taking a powered sharpener out into the woods for you. So if they're doing most of the show opening and stuff at the house, then I would push them that direction. For people that want specific angles for different knives, have you know a larger collection, I would push them up towards say the ken onion. It's just a bit more versatile. Comes with more abrasives, you have more angle adjustability, more speed adjustability. So it's really you know, you start getting into the enthusiasts. We start going into the higher and higher and powered sharpeners, and then from there we have are down at the other end, we have you you mentioned pull throughs, so we have some carbide pull throughs also. Those are they're great sharpeners if you just want a quick edge to get you back to work. So if you're out in the field, your sharp your knife is dull, you can pull them through carbide. You know. Basically it just kind of, for lack of a better term, it kind of squeegees the steel off of the edge. Just you pull it through and it just scrapes material parallel along the edge of the knife. It doesn't give you the best edge that you're going to get off of a sharpener, but it will give you an edge that's usable. Again, it'll make a difference and it'll make the cutting easier. And then on the other side of it you flip it over and then there's two ceramic rods also and that's used for kind of honing that edge, because when you come off of a car bide, it's gonna be a fairly rough edge. So you can drag it through the the ceramics or the ceramic rods and help refine that down to get you to edge where you know, if you're a skin in a deer and help that you can get back. And I mean it'll make an edge easily good enough to do that. Yeah, that's my speed, if I'm being honest. Um, I was talking to a fella that he was telling me that some of those pull throughs. It can because you're pulling the knife through and it's leaving a grain that is like, Um, I guess it'd be with the like with the whatever with your blade, it will it can decrease the durability of the edge. Is that true? Yeah, it's not going to stay sharp very long, just you're not getting into that finite edge. The best edge you can get, or a better edge is always having the abrace of going into the cutting edge rather than a long the cutting edge, which is what you're describing. Yeah, it's just not a very refined edge. So yeah, I would agree with what you're saying oh, I gotta follow up question on that. Go ahead. I was gonna say, you're talking about like into versus a long but is there a difference between like I use them in the kitchen sometimes the bigger block. I don't know what you guys call it. I think it might even be a wet stone, but it's probably I don't know, eight or ten inches long and three or four inches wide, you know what I'm talking about. Yeah, there's all kinds of different stones out. Is this one that you actually soak in water before you use it? I think? I think so, I think so. I can't remember what would you guys call it's? Yeah, well there it's called a wet stone, but it's truly what it is. It's a waterstone, right that aside, it's great because it's big, and I like it for kitchen knives. But I'm sort of always contemplating is there a difference between like laying the knife with the edge facing away from you at the far end and pulling it towards you like you'd be going like heel to edge or is it always better to lay it down and then push that edge into the stone. We've done a couple We did a video on that. We call it a push stroke versus a pull stroke. Do you want the abrasive going into the cutting edge or do you want the abrasive moving away from the cutting edge? And the results we got and we have the video on our YouTube channel. The results we got. There's a very very very small difference between the two. What I tell people is sharpen the way you're comfortable and where you can be repeatable and successful. If you're successful and you're getting a sharp knife, that is how you should be sharpening. The difference you're going to see between going in and out, you know, into the edge or away from the edge, is very small. And what you're really looking for is just a sharp knife. So however you're getting successful, and that goes with the sharpener too. Whatever sharpener you're comfortable musing and that you will use and that you're successful with, that's the sharpener you should be using. There is no catch all, you know, like everybody should be doing this the same way. It's whatever you're comfortable with and however you're getting successful, that's what you should be using. I feel like the guided thing that really helped me go from a sort of a very beginner knife sharpener. It's to somebody that had some confidence and felt like I could take someone else's knife and put a knife edge on it. Because it was before I don't even might even before you guys were even doing knife sharpeners. But there is a company called Lansky that had a guided system that would clamp onto the heel of the knife and then you could choose which angle and you put the little rods in there that were connected to the stones. And you know, once I started using that and doing the sharpie trick, that really sort of the light bulb went off, because it's amazing with that sharpie trick when you get it just right. You put you put your line of sharpie on your edge and one stroke and then all of a sudden, the sharpie's just gone. It's gone from the very tip and all the way to the heel, and you know you've nailed that angle. And at that point, it's like, once you have that and you start working, you're gonna see progress pretty quickly. I feel like, Yeah, that's one of the fun things is when you finally get it that first time where you really get a sharp knife. And that's one of my favorite things. You know, you go to shows or I do classes and teaching people how to sharpen. When they finally get it and they you know, they can cut a piece of paper, they can shave a little hair off their arm, and their eyes light up, it's like you just gave them that experience of something they've never been able to do. And that's just that's one of the things. I know. It sounds like I'm a gee for this kind of stuff. It just sounds silly to be excited about somebody else being able to sharpened a knife. But it's it's not just sharpening a knife. You just gave them a skill they didn't have. Yeah, and it's it's it's a lot of fun and I really enjoy it. And yeah, you're right that Lanski is they've been around for a long time. It's a great sharpener because it does it holds that angle for you. We have our own version of it that we just launched a couple of years ago called our Precision adjust which is it's within that same realm. You know, you clamp the knife, you have your abrasive on a rod, and then you can adjust the angle that you want to sharpen on, which makes it a lot easier to to keep a consistent edge. But every sharpener we do has some sort of an edge guide to help you along with that. Just because people don't know what twenty degrees is, you know, the human eye can can typically spot. Do you look anywhere you're at, You're around around anything man made there, You're constantly bombarded with horizontal and vertical features. So the and I can find those really easily. What they can't find, and I'm not even that great at it is if you tell me to hold a knife at seventeen degrees, I'm not going to be at seventeen degrees. I may be close, but I'm not going to be at seventeen or twenty or thirty five. But if you tell someone to hold a knife vertical or horizontal, what we've found is people can usually nail that within half a degree to one degree. Oh really, but but you try to do it's tell them to hold it at seventeen degrees, We're going to be off from five to ten to twenty. It's just you know, people just you know what is seventeen degrees. It's just not something that's natural to us. Sure, sure, all right, before we will let you go, let's just touch a little bit on how this all applies to broadheads and if there's any you know, major differences that you want to point out. I've been using actually that precision a just sharpener for by broadheads, and it's been working great because the different broadheads that I'm sharpening actually have different angles on them. I can't remember at the top of my head, but I do it the same way. I clamp it in there, I do the sharpie trick, I do some light strokes. If I don't have it quite right, I adjust it, and then once the sharpie's leaving the edge uniformly, I know I'm there, and I go at it until I get the burr. But I'm doing mostly single levels. But yeah, is there anything you want to add or tell people what they should be like looking out for if they're thinking about doing this with their broadheads. Yeah, broadheads are a bit more of a challenge just because there's just such a variety of them. You know, as you mentioned, there's single bevel, you know, there's the one piece construction three blade, then there's you know, all the different mechanicals and stuff. But that being said, the process for getting to a sharp broadhead or the sharp edge on your broadhead is exactly the same as sharpening a knife. You still need to develop that burr, You still need to be consistent on that angle, and then you know, you still need to be able to hone all that down into your broadheads. We want those things really sharp because you want something just ripping through that animal. But the process is all the same. It's just you're going to run into a little bit more challenges just due to the shape and the construction of your broadheads. Okay, got it. One quick question. A leather strap, that's what they call that, right, What is the purpose of that leather strop is? Really the leather is a carrier for even finer abrasives. Now you get down into like our ceramics, they're in the neighborhood of a twelve hundred grip, and then we have abrasives on some of our belts that are down to twelve thousand grip. But when you get into leather, it allows, as you to purchase or make your own or whatever, you can get different compounds and different diamond emulsions for them to where you can get down into like quarter micron and even farther. So it just it's really it's just it's a carrier for finer abrasives. And if you want to get into you know, mirror polished edges or just ridiculously sharp knives, stropping as the way to go. That's like your old school barbers. You know, they had that big leather strap with their straight razor. They'd run it back and forth, and that's how you would maintain to be able to get something, you know, where you can shave a you know, shave a person's face without tearing them up. Um, but yeah, you can a strap. We'll take it to the next level sharpening. Got it cool. But like the field sharpener that I use, it has a little piece of leather on it, but I've never added any compound. Does it come with an with an impregnated compound? It does, comes impregnated with half half micron chromium oxide. That's that green coating you see over the top of it. So if you go as we were talking earlier, you start sharpening on that, you know, you'll go from the get the burr flitch over to the fine diamond, a few strokes there, and then go to the fine ceramic. Do some really light strokes and then come back and pull it across that strap. And keep in mind when you whenever you use a leather strop, you always want to be pulling the edge across the strop. You never want to go with the cutting edge into the strop because you'll just cut into the leather very conformal. So you want to go with the edge going away from the leather strop. And you come in and do a few little light strokes on that, you know, test your sharpness with the ceramic, and then do say five or six light strokes on the leather and then do that same sharpness test again and I think you'd be pleasantly surprised it gets ridiculously sharp. I think that's a great way to wrap this up is tell us how when Jordan and I get together next week and were like, we're gonna sit down and we're gonna say like, oh, yeah, I've been sharpening my knives or my broadheads, and then we're gonna have a little test, a little contest to see who's got the sharpest knife. And I mean, I'm making this fun, but this is just like a way to test that you have achieved this super sharp knife. What's your go to method if you just if I just gave you a knife and you're like, oh, I'll tell you how sharp it is? How do you do that? My favorite way is to cut through paper because it does a couple of things for you. Want It'll tell you how It'll tell you whether or not your knife is sharp because it should just glide through the paper. And it'll also tell you if there's any damage remaining because there's little tiny chips and I can't see it. If I cut through paper, you'll feel it as it's going through. It's just a nice clean slice and all of sudden you get this little and it'll hang up just a tiny bit and you'll know, Okay, I got a little spot right there that needs some more attention. So that's my go to. Some other ways you can do this, you know, if you don't mind looking like you have the mains, you can shave a little hair off your arm. Other ones are you can use your like my thumbnail. I'll use that. I'll just lightly, very lightly and very carefully place the cutting edge at like a forty five to your angle on your thumbnail. If it sticks, you got a good working edge on there, and you can just test that all the way down to the tip. Just keep picking it up and just kind of keep poking it in there and see if it sticks. If you don't want to do that on your thumbnail because that freaks some people out, you can grab say like a just a plastic pen and see if it'll if the cutting edge will stick. If it just slides off of your fingernail or the pen, then you know you have some rolled areas or blunt blunt edges and it's not sharp because it's not grabbing. Okay, so both the pen and your nails are just soft enough that it's like a good medium to test that because the sharp edge is gonna grab it in a dull edge is gonna slide across it. Exactly interesting, awesome, Well, thanks thanks a ton for coming on, Steve. I kind of want to do a shameless plug for work Sharp's YouTube page because I've been spending some time on there. You guys have a ton of videos and super good it's a super good resource for people to go and like just these different sharpeners, like how they work and how you guys are using them. So that's a great resource. No, thank you for that, Jordan appreciate it. Yeah, we put a lot of work until we're I think we're over a hundred videos on there now and some of them are you know, obviously we're using it to show how to use our products because it's a great resource for us too, and people have questions, we can direct them to that and they can actually see it. But a lot of them are on there too. It's just sharpening information, not necessarily about our sharpeners. We're not trying to sell you something. We just want people to learn how to sharpen and how to be successful. And we go now not just sharpening. You know, there's one of the videos in there where I took a pairing knife and I put it in a vice and snap the tip off of it, and I show you how to fix it so when you're done, it doesn't look like the knife's ever been broke. So there's a lot of repair in there, and you know, I just a lot of good information. I've got a couple of those broken tips pairry knives in my drawer right now. You should look that video up, Yeah, I should. Is there a broadhead sharpening video on that channel? I'm not one hundred percent sure. I want to say we did do some with broadheads, but I will definitely bring that up to our our social guys, the ones that are doing the videos, the media guys. Yeah, maybe you can send us some some ideas of broadheads that you'd like to see sharpened. We'll get some and we'll put a quick video together. Fun one. We've done a couple of videos where we have people send in, you know, it's like, what would you like to see sharpened? And they try to stump us my favorite ones to do. It's a lot of hell yeah, it's a lot of fun. You get some wacky stuff. Oh yeah, I don't understand why I haven't thought about that before. I just I guess I didn't know about that. But I'm one hundred percent I'm going to send you some broadheads and how do you guys do that? Because and it'll be very educational and too. It'll it'll it'll be it'll make for some good content. But yeah, Steve, thank you so much for coming on. Listeners. Remember, if you have questions, you can send those to gear talk at the meat Eater dot com. You can also go to the metaor dot com and go to the podcasts WebKit page. So going to podcasts, then find gear Talk, then find this particular episode. If you want to comment on this episode, there's a comment section right up top. You'll see it says comments. Just hit that it'll take it to where you can comment. And then m yeah, Jordan, I are on there usually you know, same day at airs and then the week after, so kind of checking the comments and answering questions and it's a great place for us to have a conversation and then use your questions and comments for farther content and learning more. So please do that, um and uh yeah, enjoy your next couple of weeks till the next episode of gear Talk, and get out there do some houting. Hey yeah, thanks everyone, Thanks Steve Thik, You're welcome. Thanks for having me on, guys, I really appreciate it's just funn
Presented By
Featured Gear
Shop All
While you're listening
Hunt
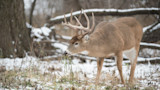
Rut Fresh Report: 12/12

Sadly, the best deer hunting is over for most of the country. That doesn’t mean it’s impossible to tag a mature buck in mid-December though. As Mark Kenyon said on the Wired to Hunt Podcast, “The late season is the great season.”
Like we often preach when hunting the rut, you just need to keep it...
Spencer Neuharth
Dec 12, 2019
Read More
Play Now
Hunting Gear
Choosing a Hunting Knife

Knives are a crucial part of any hunter’s gear and choosing the right knife for the job is important when it comes time to cleanly break down an animal. Blade styles vary and some are excellent choices for all-purpose use while others are aimed at specific tasks. You’ll need to decide which blade...
Brody Henderson
Jul 20, 2017
Read More
Play Now
Gear
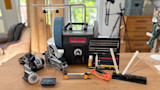
The Best Knife Sharpeners

A dull knife is like a rusty car or a worn out pair of sneakers. It’s almost useless and can be quite dangerous. Your knife will get dull eventually. Rather than replace it, it’s far cheaper to sharpen it. The question is how.
You can sharpen a knife on a rock. I once watched two skinners in Africa...
Matthew Every
Jul 1, 2026
Read More
Play Now
Save this episode
Conversation